Bootable versus non-bootable volumes on CloudFerro Cloud
Each volume has an indicator called bootable which shows whether an operating system can be booted from it or not. That indicator can be set up manually at any time. If you set it up on a volume that does not contain a bootable operating system and later try to boot a VM from it, you will see an error as a response.
In this article we will
explain practical differences between bootable and non-bootable volumes and
provide procedures in Horizon and OpenStack CLI to check whether the volume bootable or not.
Bootable vs. non-bootable volumes
Bootable and non-bootable volumes share the following similarities:
Data storage: both types can store data (regardless of being bootable or not)
Persistance: they can be retained even if an instance is removed
Snapshots: they allow you to create snapshots which represent state of a volume at a particular point in time.
From a snapshot, you can spawn additional volumes so volumes act as a means of both conserving data and transferring of the data.
Bootable volumes usually serve as a boot drive for a virtual machine while non-bootable volumes typically function as data storage only. Bootable volumes can also contain data but one part of capacity will be devoted to the operating system that they contain.
On the other hand, non-bootable volumes can
add more storage space to an instance (especially for applications which require lots of data) and
separate data from the operating system to make backups and data management easier.
What We Are Going To Cover
Which volumes appear when creating a virtual machine using Horizon dashboard?
Attempting to create a virtual machine from non-bootable volume using OpenStack CLI
Checking whether a volume is bootable
Checking whether a volume snapshot was created from a bootable volume
Modifying bootable status of a volume
What happens if you launch a virtual machine from a volume which does not have a functional operating system?
Prerequisites
No. 1 Account
You need a CloudFerro Cloud hosting account with access to the Horizon interface: https://horizon.cloudferro.com/auth/login/?next=/.
No. 2 OpenStack CLI client operational
We assume you are familiar with OpenStack CLI client. If not, here are some articles to get you started:
How to install OpenStackClient for Linux on CloudFerro Cloud
How to install OpenStackClient GitBash for Windows on CloudFerro Cloud
Once you have installed this piece of software, you need to authenticate to start using it: How to activate OpenStack CLI access to CloudFerro Cloud cloud using one- or two-factor authentication
No. 3 Familiarity with the process of creation of virtual machines within OpenStack
When creating a new virtual machine in OpenStack environment, you can decide what storage should it use to boot the operating system. These are some of the available options:
ephemeral storage: Ephemeral vs Persistent storage option Create New Volume on CloudFerro Cloud
an exisiting volume
an existing volume snapshot
a volume being created while creating a virtual machine
Article How to create new Linux VM in OpenStack Dashboard Horizon on CloudFerro Cloud shows the general procedure for creating a VM while articles VM created with option Create New Volume Yes on CloudFerro Cloud and VM created with option Create New Volume No on CloudFerro Cloud discuss various options in connection to volumes.
If you create a virtual machine with option Create New Volume set to Yes, a bootable volume will be added to a list of your volumes.
Which volumes appear when creating a virtual machine using Horizon dashboard?
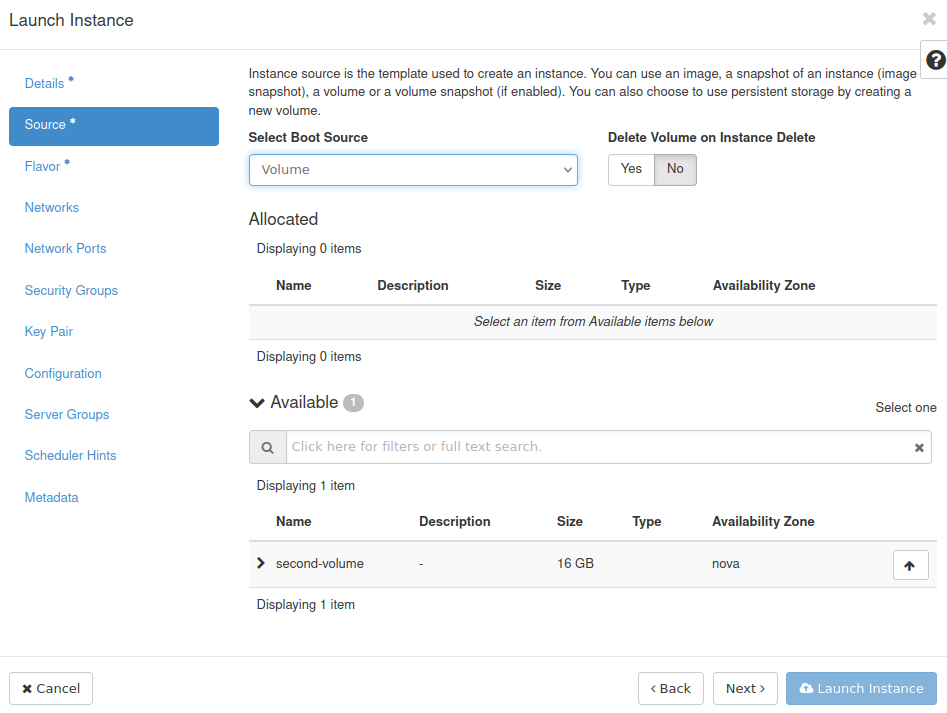
Only bootable volumes appear while creating a virtual machine using Horizon dashboard.
Let’s assume we have two volumes called first-volume and second-volume and let us say the former is non-bootable while the latter, second-volume, is bootable.
This is how they look like in Horizon dashboard:
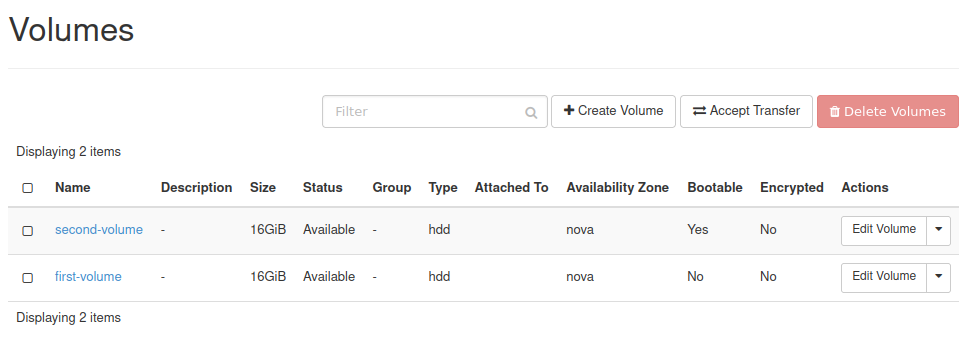
When creating an instance, if we choose Volume from drop-down menu Select Boot Source, only second-volume will be visible because it is bootable.
Attempting to create a virtual machine from non-bootable volume using OpenStack CLI
OpenStack CLI client will also block an attempt of creating an instance from a non-bootable volume. If this happens, it will return a message similar to this as output:
Block Device cf3143bf-d227-4fa3-9224-c078f1ebdbad is not bootable. (HTTP 400) (Request-ID: req-d15e8fd6-028f-4d6b-904f-32dc78ccc3ad)
Checking whether a volume is bootable
Checking whether a volume is bootable using Horizon dashboard
Navigate to Volumes -> Volumes of the Horizon dashboard. You should see the list of your volumes:
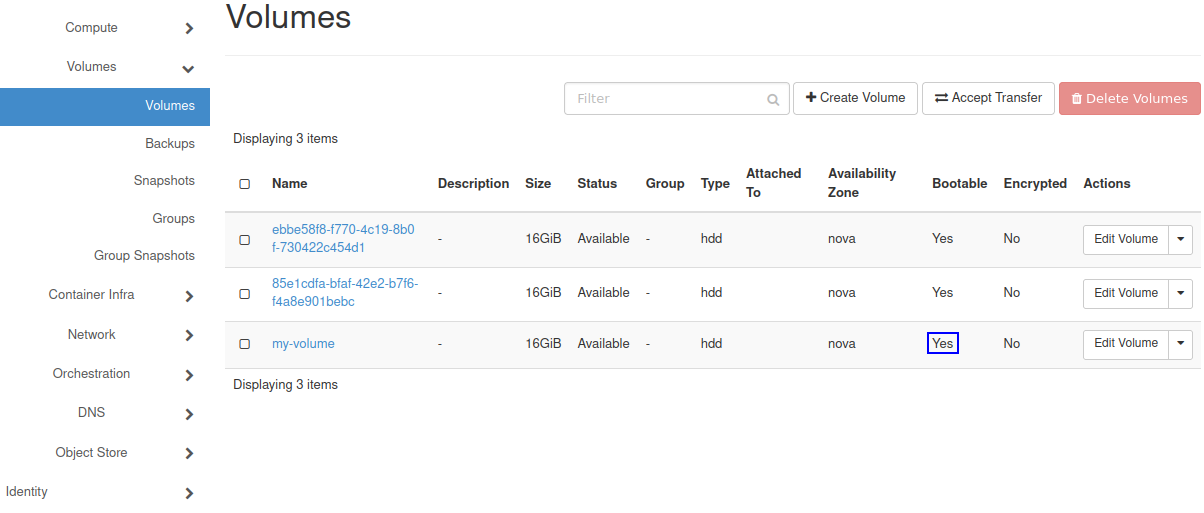
On this screen, in the row containing the volume you want to modify, check the value of column Bootable. On screenshot above, bootable status for volume my-volume was highlighted using the blue rectangle. It shows that that volume is indeed bootable.
Checking whether a volume is bootable using OpenStack CLI client
Execute the following command to list volumes:
openstack volume list
You should get output similar to this:

This contains information about your volumes, such as their IDs, names and sizes. To check whether a volume is bootable, execute the command below:
openstack volume show -c bootable <<volume_id>>
You should get information whether the volume is bootable:

Checking whether a volume snapshot was created from a bootable volume
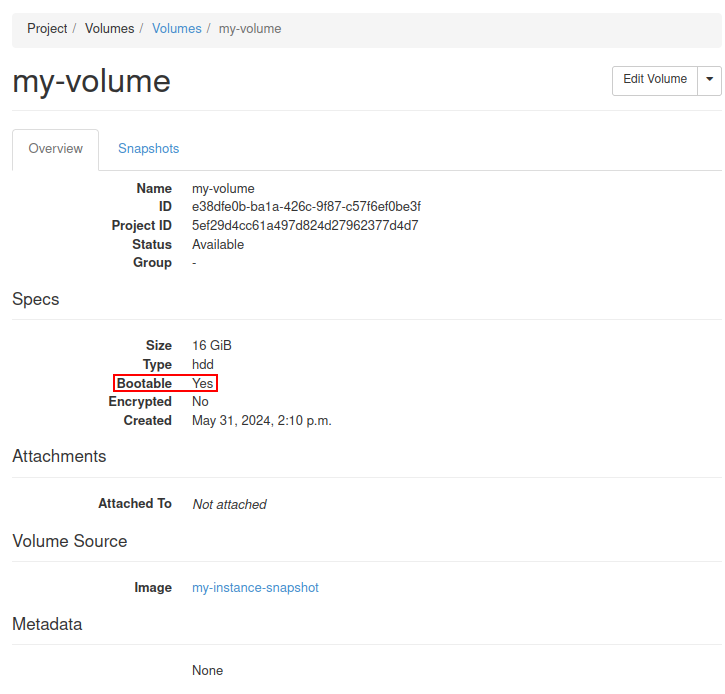
If you want to create a virtual machine from a volume snapshot, make sure that a volume from which that volume snapshot was created is bootable.
Checking whether a volume snapshot was created from a bootable volume using Horizon dashboard
Navigate to section Volume -> Snapshots of the Horizon dashboard. You should see a list of volume snapshots:
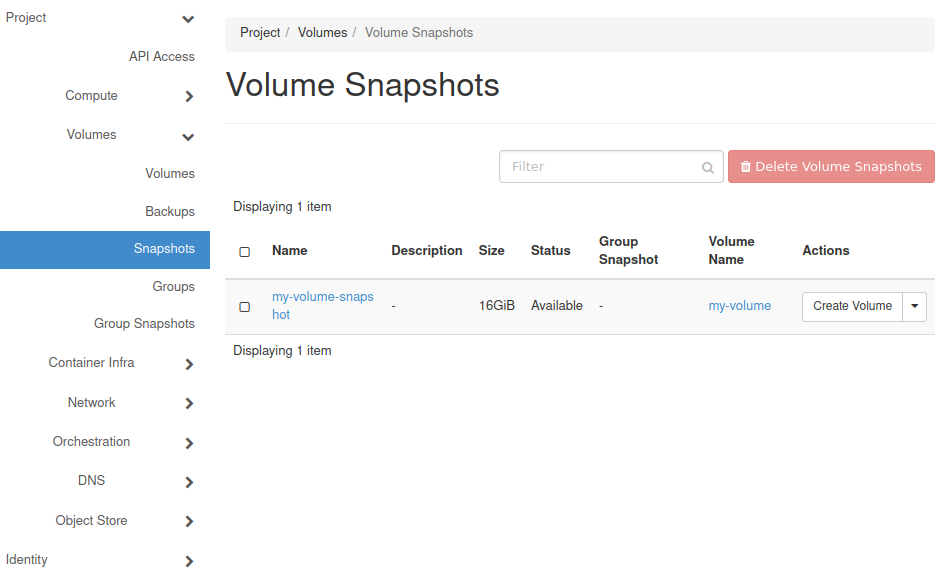
Click on the name of volume snapshot from which you want to create a virtual machine:
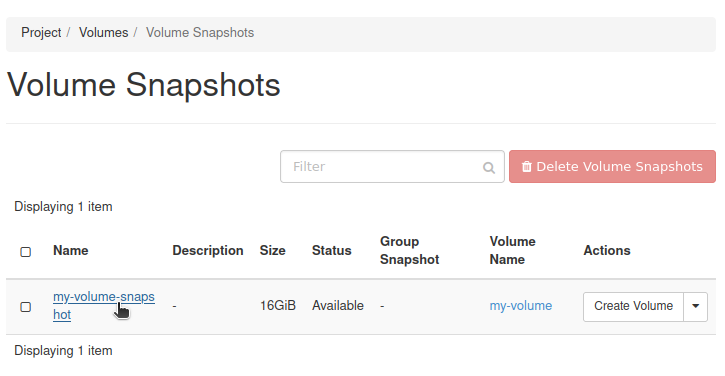
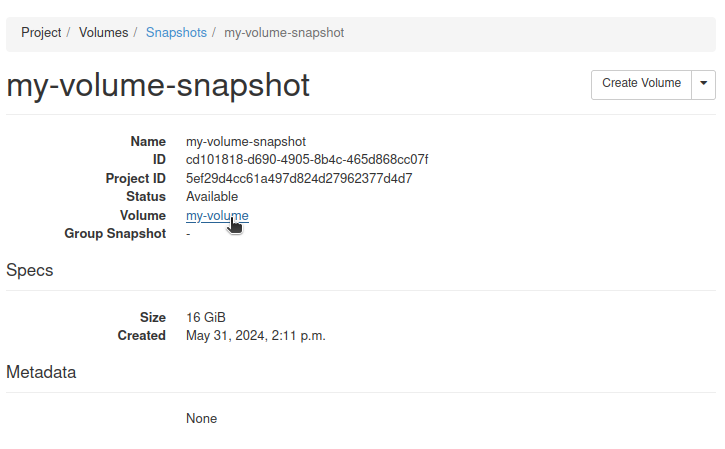
You should see the information about the volume snapshot. Click on the name of the volume from which the snapshot was created:
In section Specs, check the value called Bootable. Here, it is highlighted with a red rectangle:
Checking whether a volume snapshot was created from a bootable volume using OpenStack CLI client
Execute the following command to list volume snapshots:
openstack volume snapshot list
A list of volume snapshots, similar to this, will appear:

To see concrete data about a volume, execute this command:
openstack volume snapshot show <<volume_snapshot_id>>
and replace <<volume_snapshot_id>> with the ID of the volume you want to create.
In this example, this ID is cd101818-d690-4905-8b4c-465d868cc07f. Therefore, this is how viewing more information about this volume would look like:

Field volume_id contains the ID of the volume from which the volume snapshot was created. The following command will provide information about this volume (replace <<volume_id>> with that ID of the volume):
openstack volume show -c bootable <<volume_id>>
You should get information whether the volume is bootable:

Modifying bootable status of a volume
Modifying bootable status of a volume using the Horizon dashboard
Perform what was described in section Checking if a volume is bootable, method Using the Horizon dashboard - access the list of your volumes in the Horizon dashboard.
If you want to change the bootable status of a volume, navigate to the row containing information about that volume. There, in the Actions column choose Edit Volume:

You should see the following window:
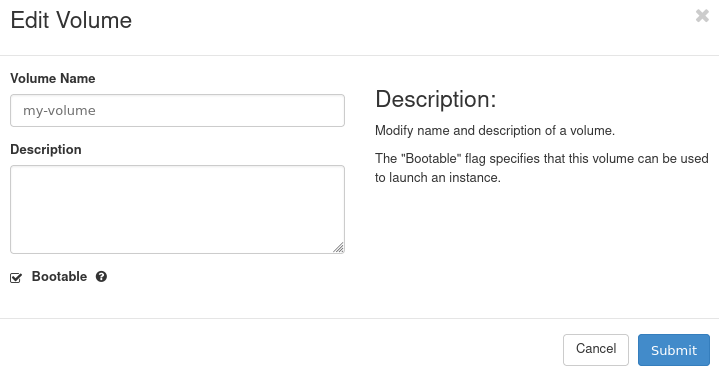
To change the bootable status, simply check or uncheck (depending on what you want to achieve) the checkbox Bootable and click Submit.
In example above, the volume named my-volume had bootable status turned on. If we want to turn it off, we can uncheck the Bootable checkbox:
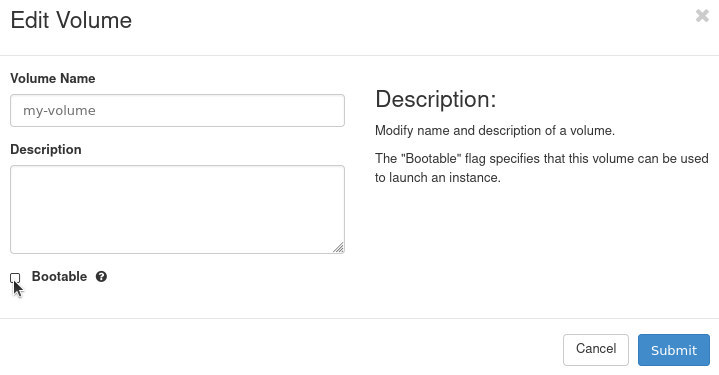
and click Submit.
The following message should appear next to top right corner of the Horizon dashboard:

And the value of column Bootable should also change:

Modifying bootable status of a volume using OpenStack CLI client
Obtain ID and bootable status of the volume which you want to modify by following section Checking if a volume is bootable, method Using OpenStack CLI client.
Non-bootable to bootable
If your volume is currently not bootable and you want to make it bootable, execute the command below. In it, replace <<volume_id>> with the ID of the volume which you want to modify:
openstack volume set --bootable <<volume_id>>
If the command was successful, the output should be empty. You can now once again check the status of the volume as explained in section Checking if a volume is bootable.
Bootable to non-bootable
If, on the other hand, your volume is currently bootable and you want to make it non-bootable, execute the command below. In it, replace <<volume_id>> with the ID of the volume which you want to modify:
openstack volume set --non-bootable <<volume_id>>
If the command was successful, the output should be empty. You can now once again check the status of the volume as explained in section Checking if a volume is bootable.
What happens if you launch a virtual machine from a volume which does not have a functional operating system?
It is technically possible to launch a virtual machine from a volume which has status set to bootable but that does not contain an operating system which can be launched.
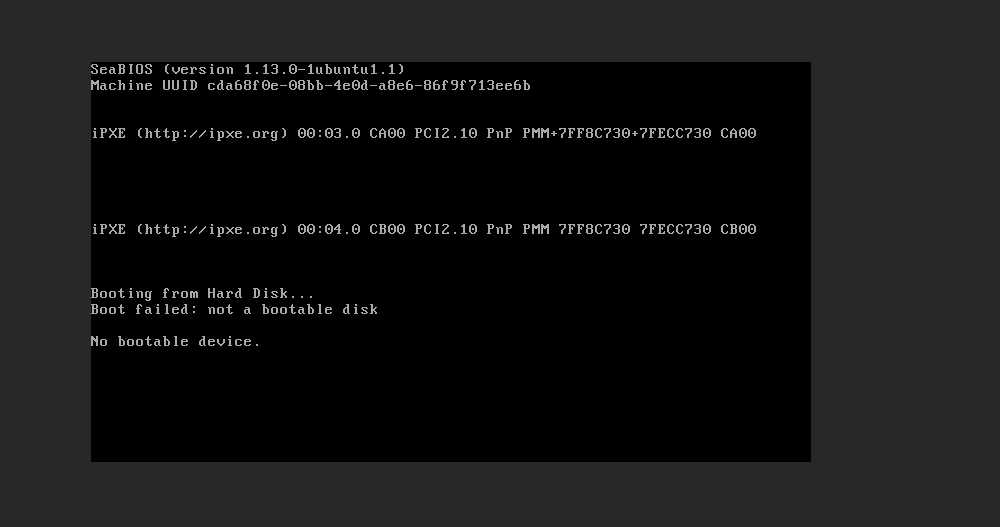
In this case, the virtual machine should still be spawned, but its BIOS will not detect a bootable operating system. On its web console, you should see that BIOS is displaying an appropriate message, similar to this:
