
My Portal on CloudFerro Cloud
My Portal brings together cloud services, projects, billing, and account management.
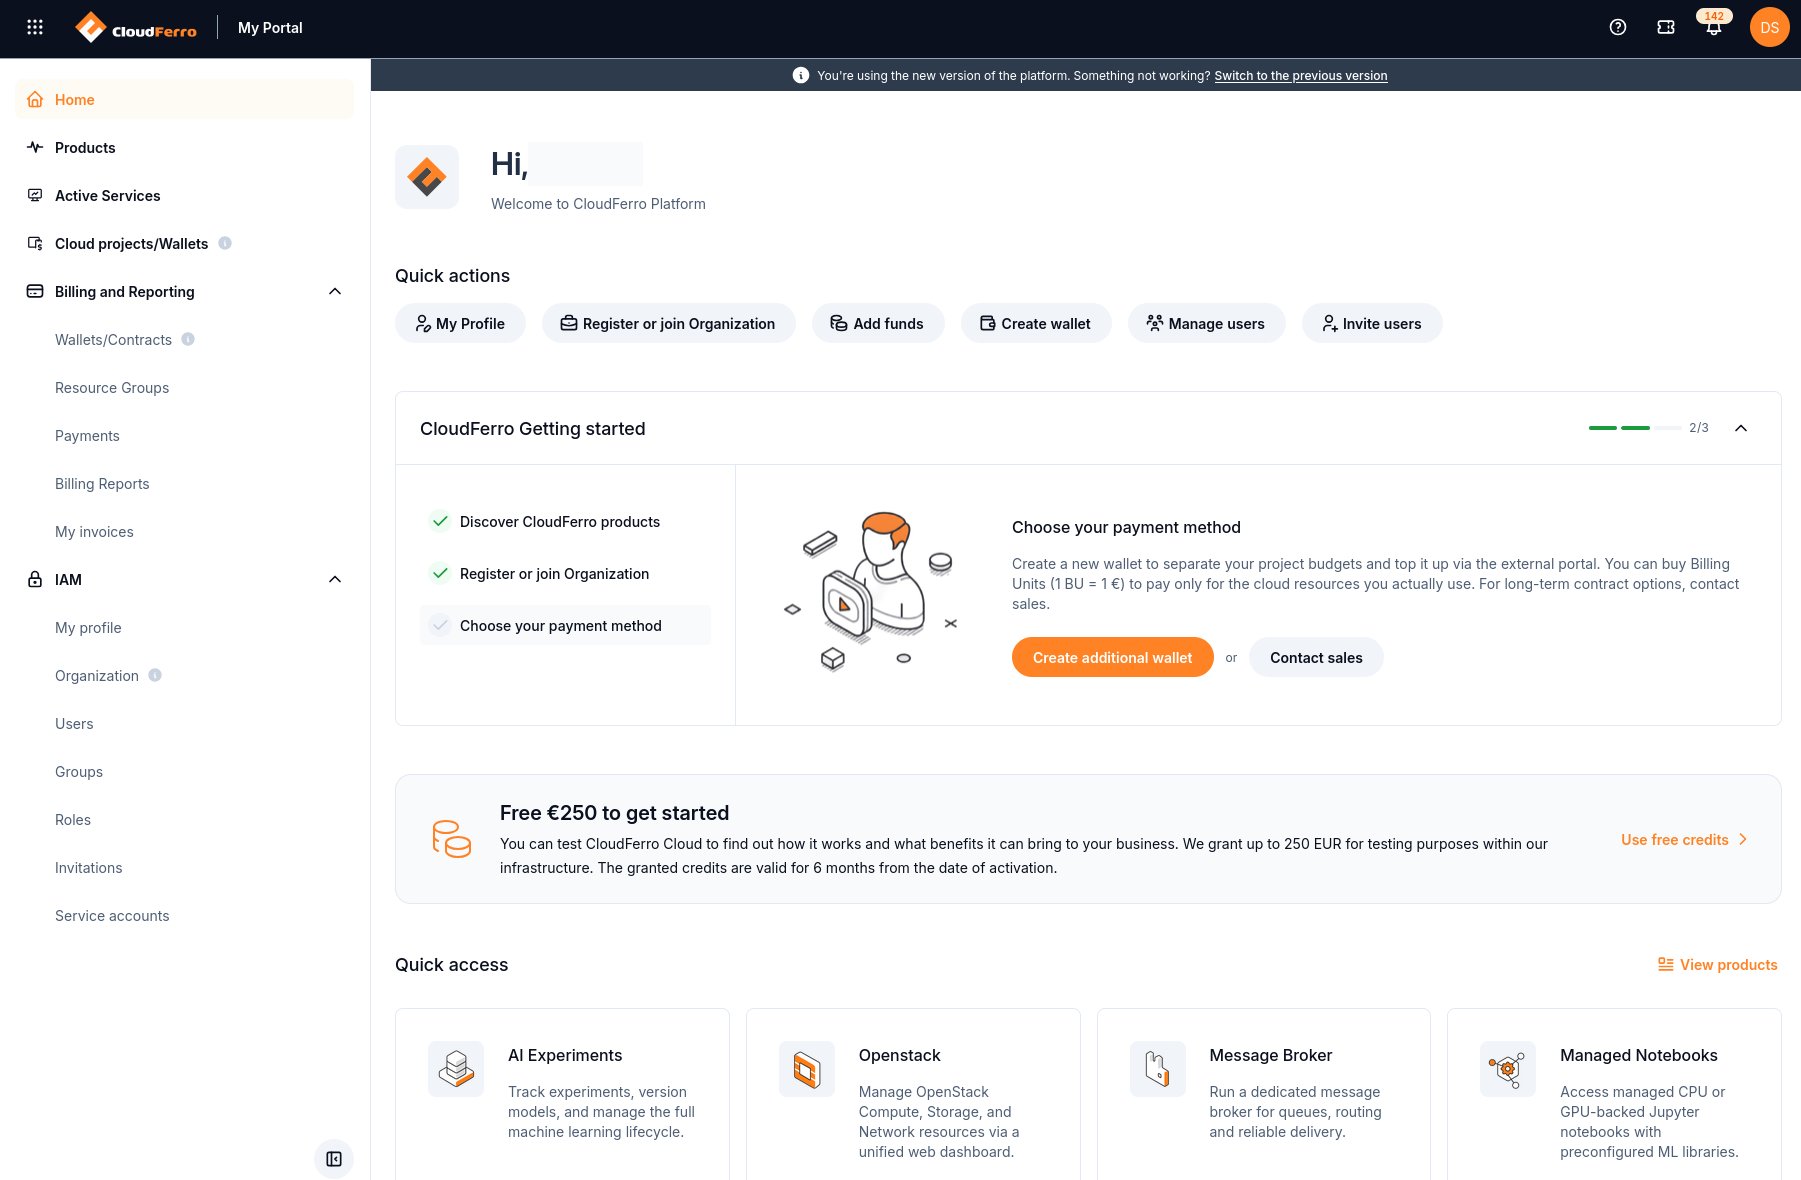
Home provides the entry points for account setup and cloud services.
To try a service for the first time, create your personal account, set up authentication, and register or join an organization. Then check the trial or billing arrangement for the service you want to use. The stages below explain what to finish before moving on; if a stage is already complete, continue with the next one.
Start with IAM on CloudFerro Cloud for account creation, authentication, and organization setup. Use Billing and Reporting on CloudFerro Cloud for wallets, payments, reports, and invoices.
- How to use My Portal for CloudFerro Cloud
- Product catalogue on CloudFerro Cloud
- Cloud projects/Wallets: manage project billing on CloudFerro Cloud
- Active Services: review billed resources on CloudFerro Cloud
- How to use Tickets in My Portal for CloudFerro Cloud
- How to use Notifications in My Portal for CloudFerro Cloud
- Troubleshoot My Portal on CloudFerro Cloud
- My Portal terms on CloudFerro Cloud
- Cookie consent on CloudFerro Cloud
1. Create an account
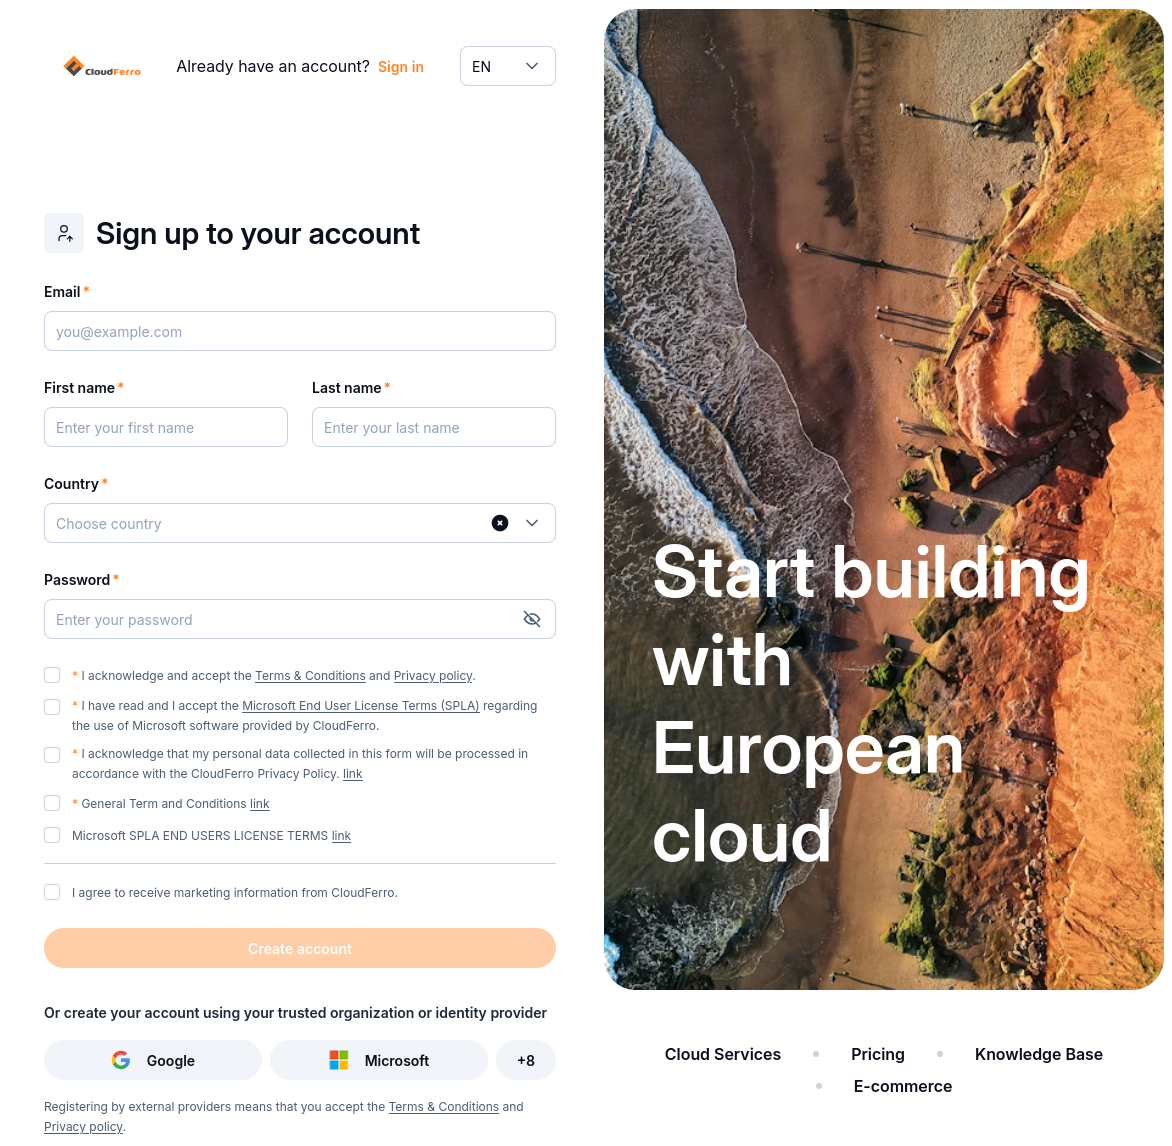
Create your personal account with the registration form.
Open the registration form and follow How to sign up for My Portal on CloudFerro Cloud. Use an email address you can access and complete the required consents. Open the verification message and verify your email address.
Ready to continue: your email is verified and the portal lets you continue account activation. If you already have an account, sign in with it.
2. Set up authentication
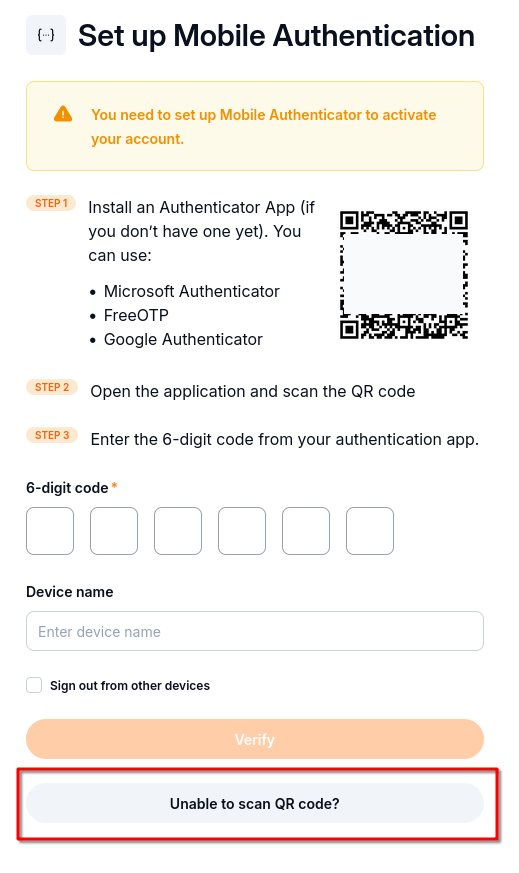
The setup screen offers a QR code and a manual-key option.
When Set up Mobile Authentication appears, choose one way to generate the required codes:
Set up two-factor authentication with a mobile app on CloudFerro Cloud to scan the QR code or enter its setup key.
Set up two-factor authentication with KeePassXC on CloudFerro Cloud to enter the key without a phone or camera.
Enter the generated six-digit code in the portal and select Verify. If you completed authentication while signing up, keep that authenticator and continue.
Ready to continue: you can sign in and reach Home. Keep the authenticator available for later logins.
3. Register or join an organization
Your personal account identifies you; the organization provides the context for shared services and billing. On Home, select Register or join Organization.
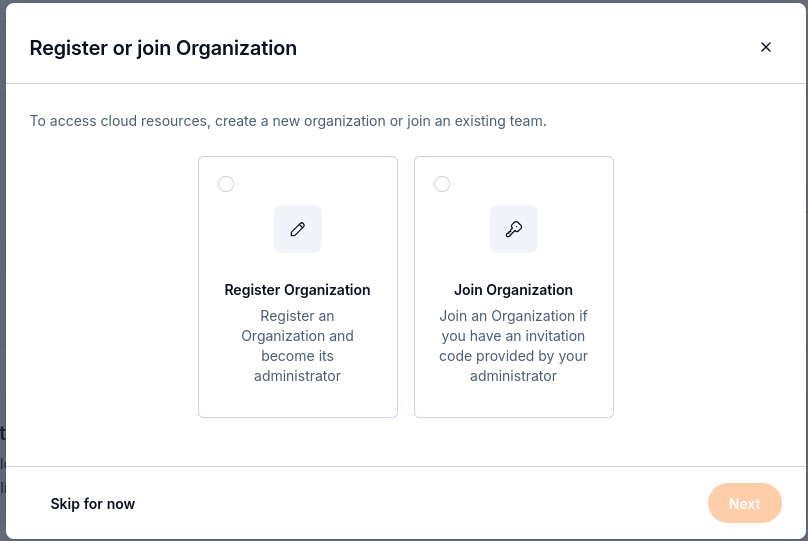
Register a new organization or join an existing team.
Your situation |
What to do |
|---|---|
You are setting up a new organization |
Follow Register or join an organization in My Portal on CloudFerro Cloud and enter its legal company and billing details. |
Your team already has an organization |
Ask its administrator for an invitation code. Follow How to invite users to an organization in My Portal on CloudFerro Cloud and wait for the administrator to approve the request. |
Ready to continue: IAM → Organization shows the organization you intend to use. A pending invitation is still awaiting approval.
4. Try a service
Request trial access or use your organization’s existing arrangement
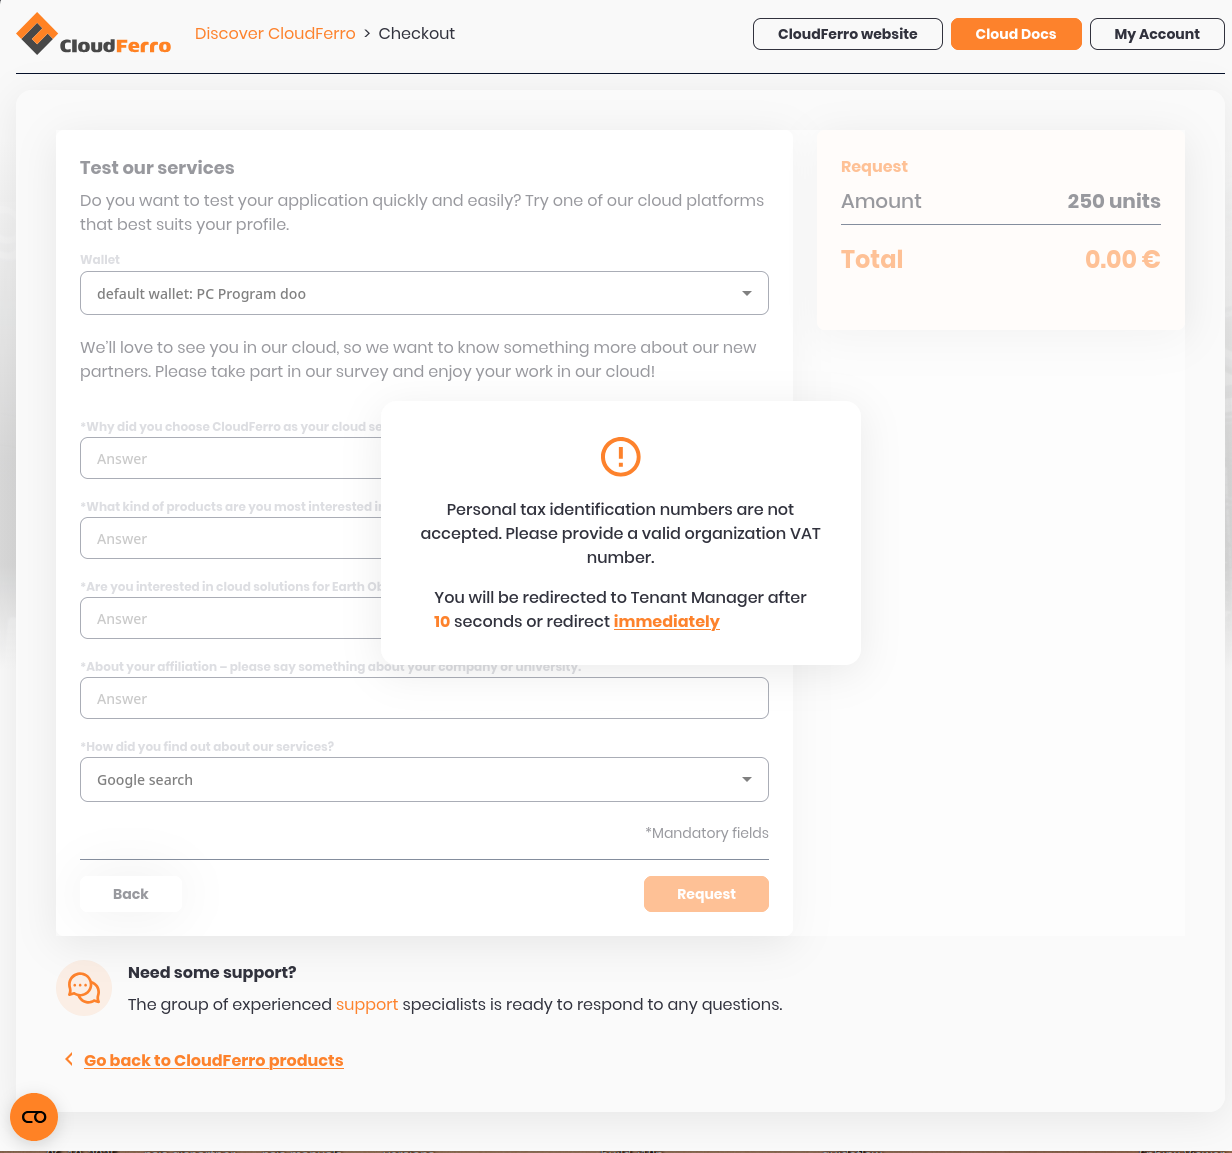
The trial form in this example is blocked by an organization VAT-number validation message.
For a new trial, select Free trial in the Help menu or Use free credits on Home. The Free Trial instructions show the wallet selector, required survey fields, and Request button. Review the current offer and conditions before submitting.
If checkout rejects the organization’s tax ID or VAT number, correct the organization details before retrying. If you cannot resolve the validation message, contact CloudFerro support. The supplied trial capture shows this validation message; it does not show an approved allocation.
Submitting a request and receiving usable credit are separate steps. Before starting a resource, check the intended wallet’s Available BU in Wallets/Contracts: review wallets and add Billing Units on CloudFerro Cloud, or confirm the existing billing arrangement with your organization’s administrator. Check that the selected service is available to your account under that arrangement.
Activate an OpenStack project
For OpenStack, prepare the project’s billing arrangement before opening Horizon. Use Wallets/Contracts: review wallets and add Billing Units on CloudFerro Cloud to check the intended wallet. For a prepaid purchase, follow How to buy credits using Pay Per Use wallet on CloudFerro Cloud.
Open Cloud projects/Wallets, select the required cloud, and follow the project-creation and activation procedure in Cloud projects/Wallets: manage project billing on CloudFerro Cloud. Wait for ACTIVATED and check the wallet assignment.
Then open Openstack from Products, choose the matching authentication provider and region, and sign in to Horizon. Check the selected project before creating resources. Activate another project or extend an existing project when you need access in another cloud.
Open a service and complete its first exercise
Open Products, choose a service in the Product catalogue on CloudFerro Cloud, and select Go to product. Check the organization and any region selector in the interface that opens.
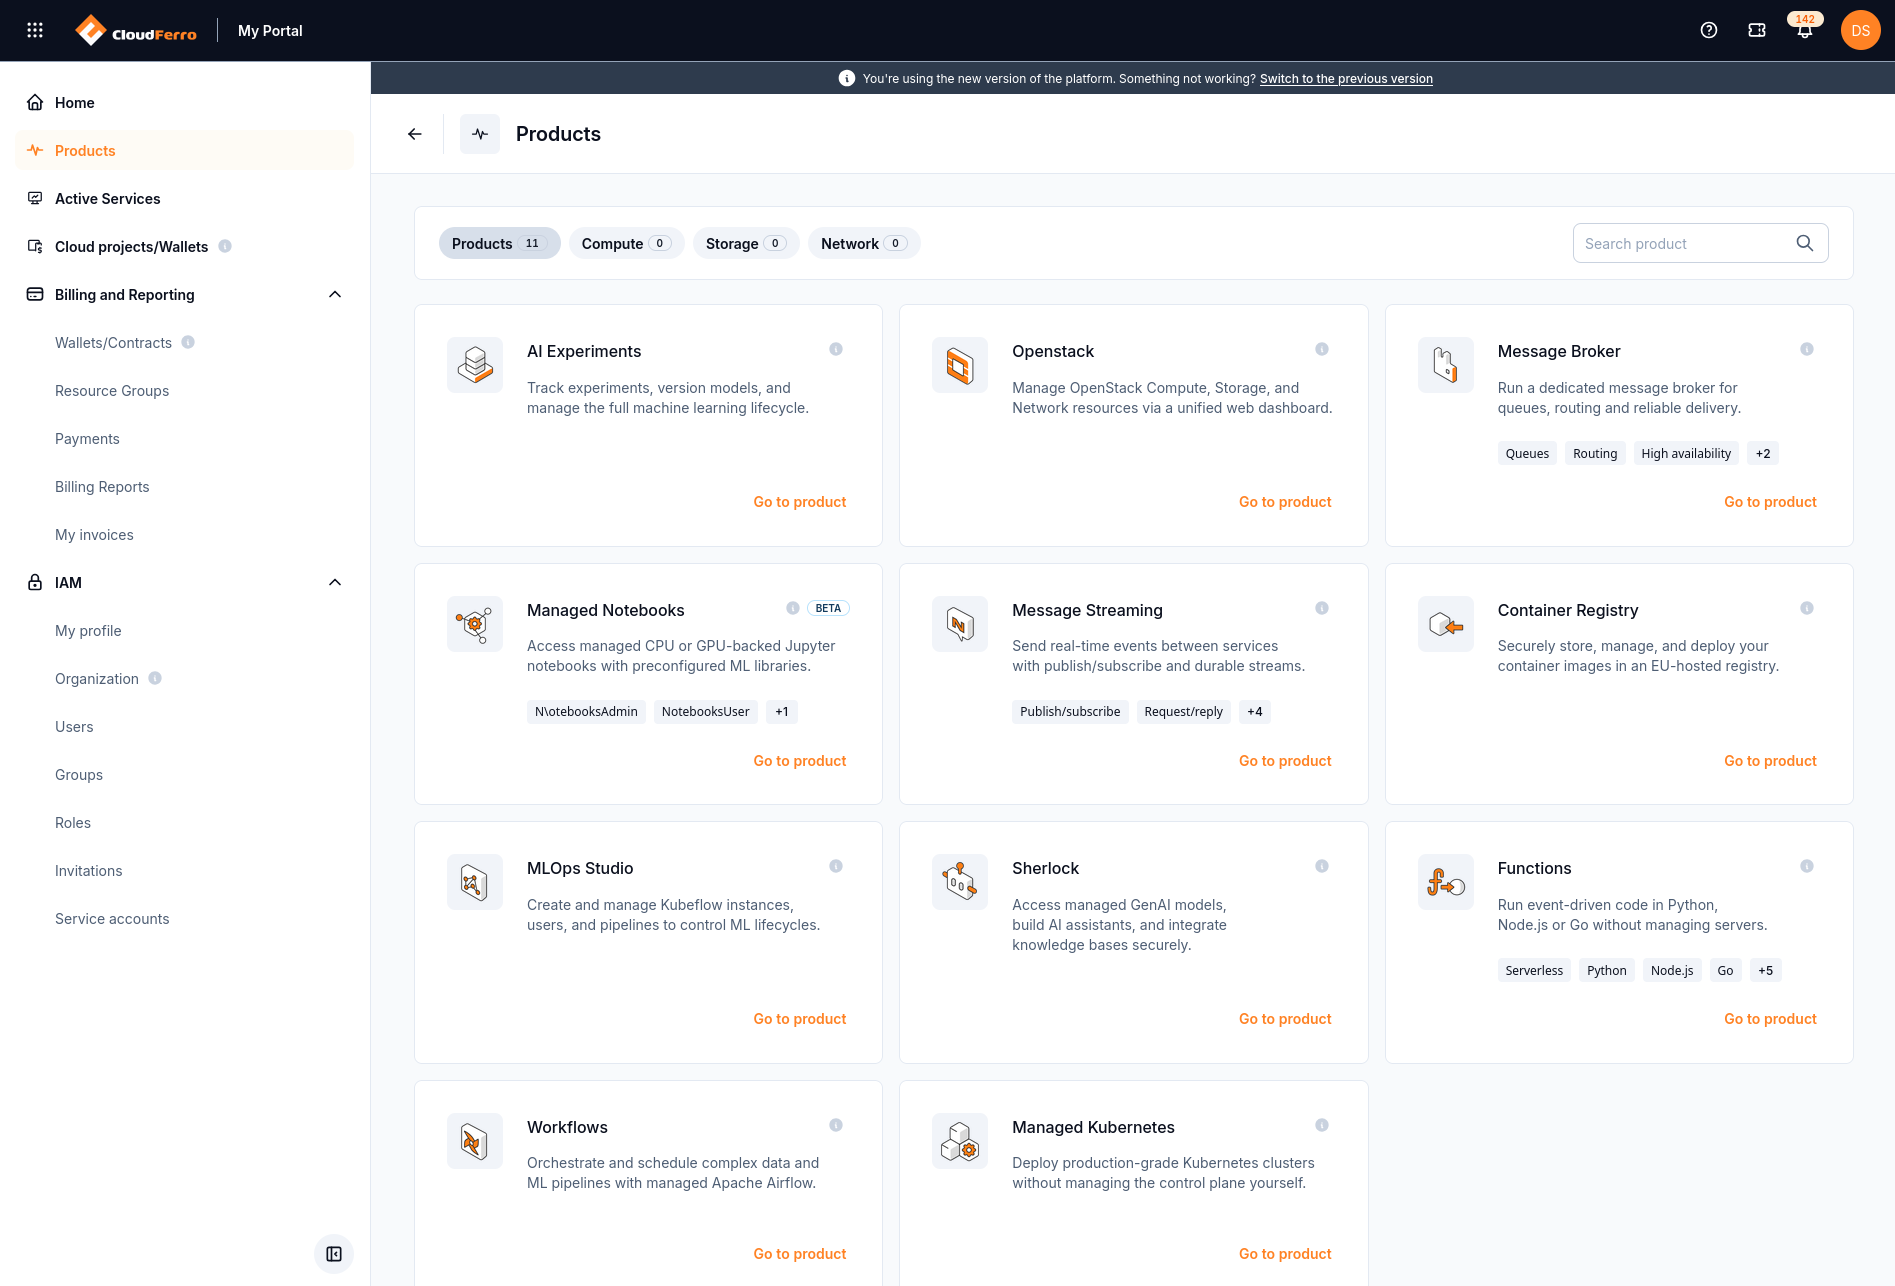
Each catalogue card has a Go to product action.
For a browser-based first exercise, follow Getting started with Managed Notebooks on CloudFerro Cloud. Check its prerequisites, then create and launch a notebook and run a Python cell. Save your work and stop the notebook when you finish; closing its browser tab does not stop it.
If you choose Openstack, first check the project, region, ACTIVATED status, and wallet assignment in Cloud projects/Wallets: manage project billing on CloudFerro Cloud. Select the matching authentication provider and region when opening OpenStack. Other products have their own setup requirements in the guide linked from their catalogue entry.
Ready to continue: you have completed the chosen product’s first task and know how to stop or remove the resources used for the test. Opening the product interface alone does not complete that task.
5. Check usage and costs
Use Active Services: review billed resources on CloudFerro Cloud to identify billed resources. In Billing and Reporting on CloudFerro Cloud, use billing reports for usage and costs, payments for purchase history, and invoices for billing documents.
Check the organization, resource, and billing period when investigating an amount. Keep the resource or payment reference if you need to ask support about it.
Ready to continue: you can identify the resources created for your test and the billing arrangement that pays for them.
What to do next
Return to the stage above that matches your progress. If a step fails, use Troubleshoot My Portal on CloudFerro Cloud to identify what to check and which details to send to support.