
How to share a private object storage container with another user on CloudFerro Cloud
You can create private containers in Object Store and grant access to selected users.
If you want to limit access to specific containers, the other users should be members of other projects. A common pattern is to use one project per user or one project per group of users.
The project can be in one or more domains.
If users are members of the same project, they can see all containers in that project. In that case, you cannot limit their access to only one specific container.
Prerequisites
No. 1 Hosting account
You need a CloudFerro Cloud hosting account with access to the Horizon interface: https://portal.cloudferro.com/.
No. 2 OpenStackClient installed and connected to the cloud
You need OpenStackClient installed on your computer.
How to install OpenStackClient for Linux on CloudFerro Cloud
No. 3 Knowledge of downloading and using RC files
To share private containers, you need to work with OpenStack RC files downloaded from Horizon.
No. 4 Knowledge of OpenStack Object Storage / Swift
The OpenStack Object Store service, also known as Swift, allows you to store and retrieve data through an API. It is designed for durability, availability, concurrency, and storing large amounts of unstructured data.
How to access object storage using OpenStack CLI on CloudFerro Cloud
Setting up the test example
In the example below, there are three projects:
main
project_1
project_2
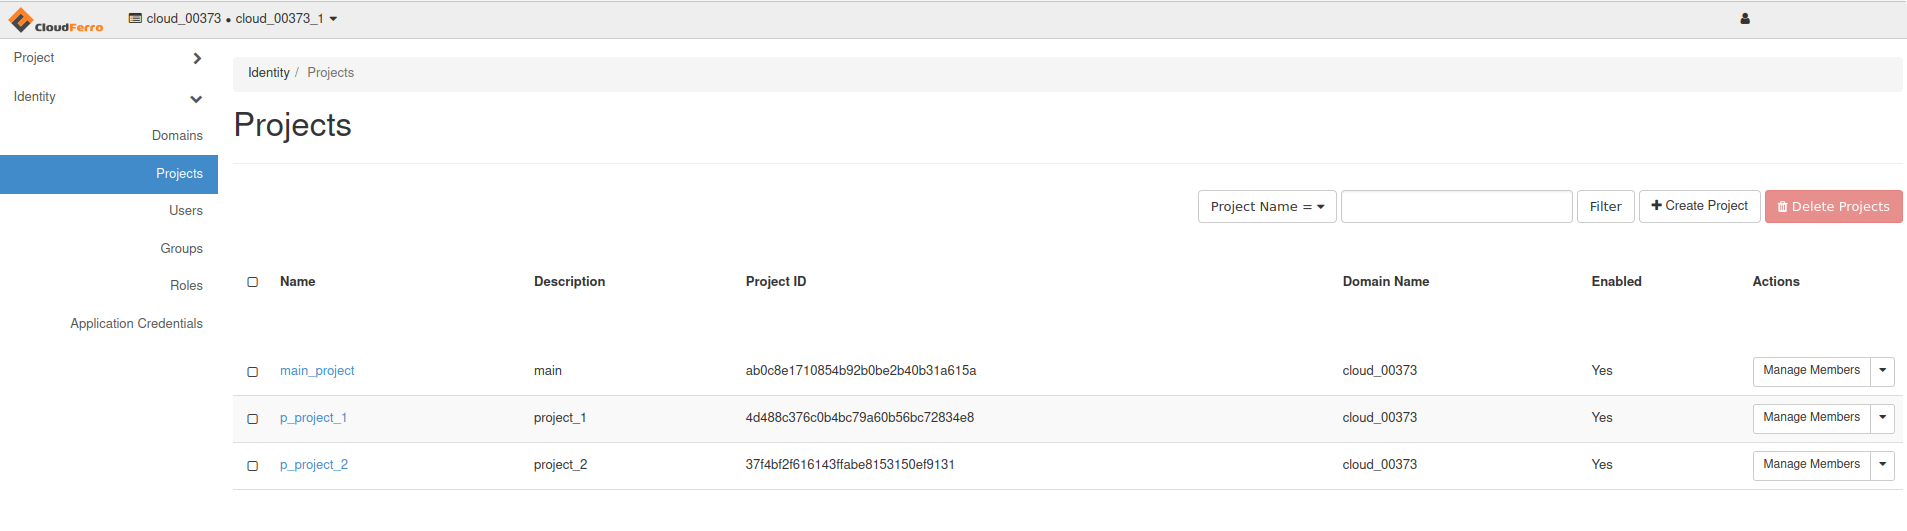
There are also three users:
owner – the user with the member role in project main.
user_1 – the user with the member role in project project_1.
user_2 – the user with the member role in project project_2.
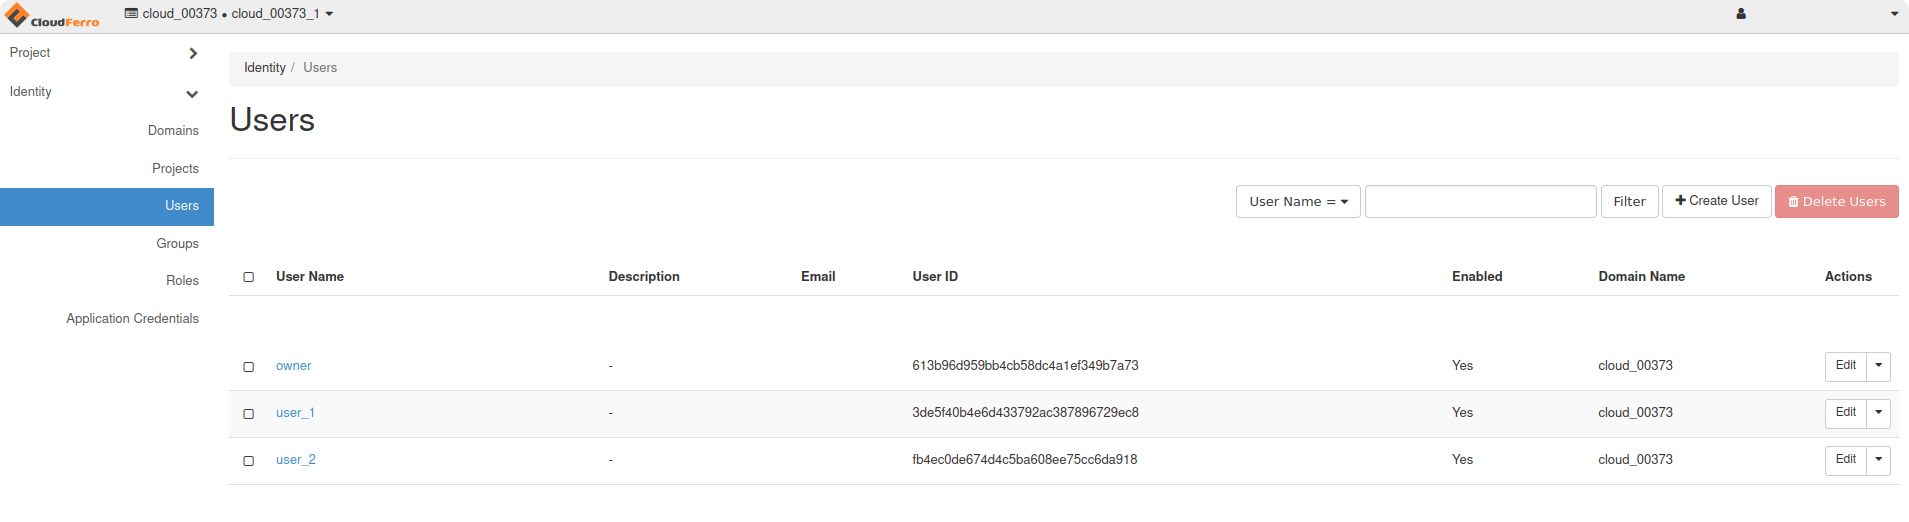
The user owner has three containers in project main:
c-main-a
c-main-b
c-main-d
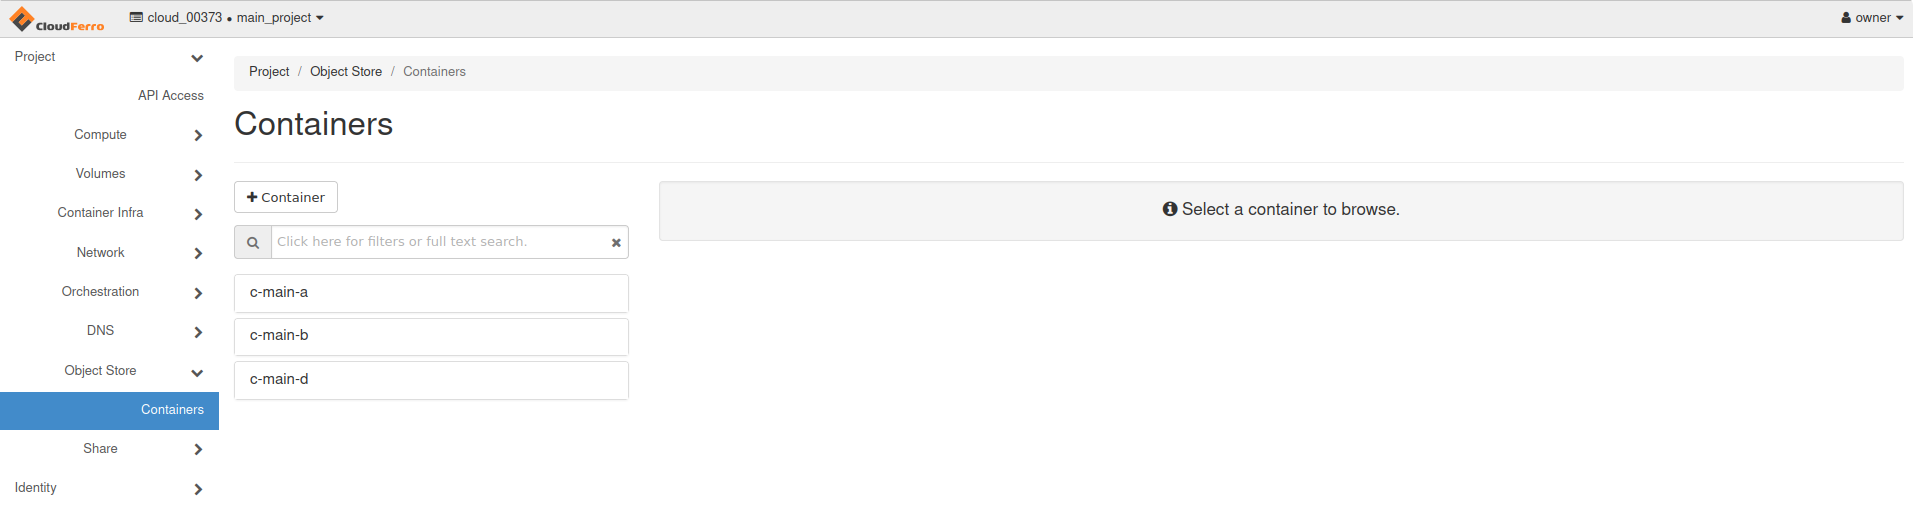
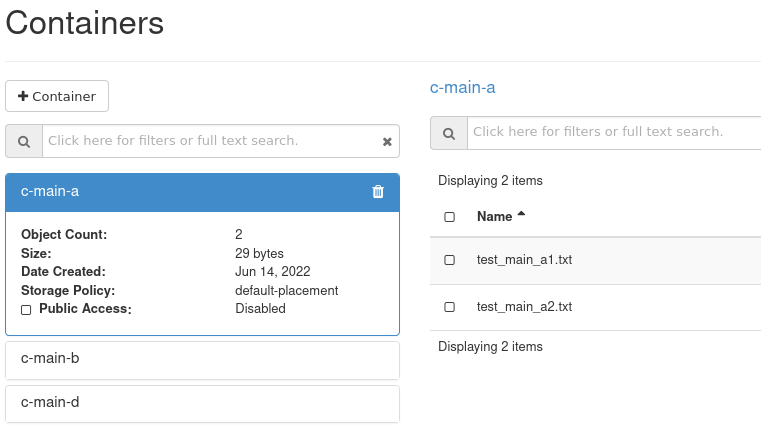
The containers contain the following files:
c-main-a
test-main-a1.txt
test-main-a2.txt
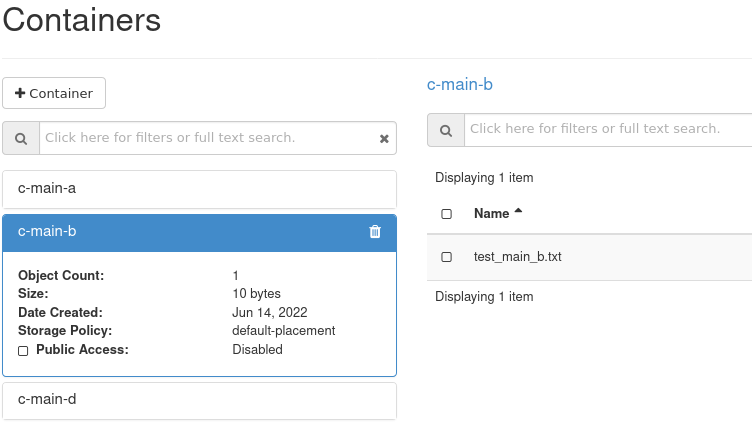
c-main-b
test-main-b.txt
c-main-d
test-main-d.txt
In this example, the user owner grants read-only access to container c-main-a for user_1.
Download the RC file for the owner project
First, the user owner signs in to Horizon:
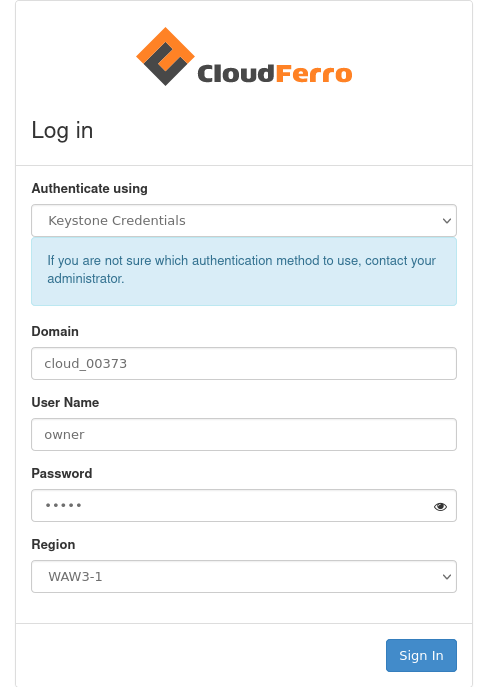
Then, they choose the main project:

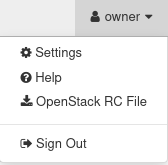
After that, they download the OpenStack RC File for user owner and project main:
Note
This article assumes that all three users access the cloud with standard user authentication.
You can preview the content of the RC file in a Linux terminal:
$ cat main-openrc.sh
Example main-openrc.sh file:
#!/usr/bin/env bash
unset OS_TENANT_ID
unset OS_TENANT_NAME
export OS_AUTH_URL=https://keystone.cloudferro.com:5000/v3
export OS_INTERFACE=public
export OS_IDENTITY_API_VERSION=3
export OS_USERNAME="owner"
export OS_REGION_NAME="WAW4-1"
export OS_PROJECT_ID=ab0c8e1710854b92b0be2b40b31a615a
export OS_PROJECT_NAME="main_project"
export OS_PROJECT_DOMAIN_ID="119f4676f307434eaf28daab5ba3cc92"
if [ -z "$OS_REGION_NAME" ]; then unset OS_REGION_NAME; fi
if [ -z "$OS_USER_DOMAIN_NAME" ]; then unset OS_USER_DOMAIN_NAME; fi
if [ -z "$OS_PROJECT_DOMAIN_ID" ]; then unset OS_PROJECT_DOMAIN_ID; fi
echo "Please enter your OpenStack Password for project $OS_PROJECT_NAME as user $OS_USERNAME: "
read -sr OS_PASSWORD_INPUT
export OS_PASSWORD=$OS_PASSWORD_INPUT
export OS_AUTH_TYPE=password
export OS_USER_DOMAIN_NAME="cloud_00373"
#!/usr/bin/env bash
unset OS_TENANT_ID
unset OS_TENANT_NAME
export OS_AUTH_URL=https://keystone.cloudferro.com:5000/v3
export OS_INTERFACE=public
export OS_IDENTITY_API_VERSION=3
export OS_USERNAME="owner"
export OS_REGION_NAME="WAW3-1"
export OS_PROJECT_ID=ab0c8e1710854b92b0be2b40b31a615a
export OS_PROJECT_NAME="main_project"
export OS_PROJECT_DOMAIN_ID="119f4676f307434eaf28daab5ba3cc92"
if [ -z "$OS_REGION_NAME" ]; then unset OS_REGION_NAME; fi
if [ -z "$OS_USER_DOMAIN_NAME" ]; then unset OS_USER_DOMAIN_NAME; fi
if [ -z "$OS_PROJECT_DOMAIN_ID" ]; then unset OS_PROJECT_DOMAIN_ID; fi
echo "Please enter your OpenStack Password for project $OS_PROJECT_NAME as user $OS_USERNAME: "
read -sr OS_PASSWORD_INPUT
export OS_PASSWORD=$OS_PASSWORD_INPUT
export OS_AUTH_TYPE=password
export OS_USER_DOMAIN_NAME="cloud_00373"
#!/usr/bin/env bash
unset OS_TENANT_ID
unset OS_TENANT_NAME
export OS_AUTH_URL=https://keystone.cloudferro.com:5000/v3
export OS_INTERFACE=public
export OS_IDENTITY_API_VERSION=3
export OS_USERNAME="owner"
export OS_REGION_NAME="WAW3-2"
export OS_PROJECT_ID=ab0c8e1710854b92b0be2b40b31a615a
export OS_PROJECT_NAME="main_project"
export OS_PROJECT_DOMAIN_ID="119f4676f307434eaf28daab5ba3cc92"
if [ -z "$OS_REGION_NAME" ]; then unset OS_REGION_NAME; fi
if [ -z "$OS_USER_DOMAIN_NAME" ]; then unset OS_USER_DOMAIN_NAME; fi
if [ -z "$OS_PROJECT_DOMAIN_ID" ]; then unset OS_PROJECT_DOMAIN_ID; fi
echo "Please enter your OpenStack Password for project $OS_PROJECT_NAME as user $OS_USERNAME: "
read -sr OS_PASSWORD_INPUT
export OS_PASSWORD=$OS_PASSWORD_INPUT
export OS_AUTH_TYPE=password
export OS_USER_DOMAIN_NAME="cloud_00373"
#!/usr/bin/env bash
unset OS_TENANT_ID
unset OS_TENANT_NAME
export OS_AUTH_URL=https://keystone.cloudferro.com:5000/v3
export OS_INTERFACE=public
export OS_IDENTITY_API_VERSION=3
export OS_USERNAME="owner"
export OS_REGION_NAME="FRA1-2"
export OS_PROJECT_ID=ab0c8e1710854b92b0be2b40b31a615a
export OS_PROJECT_NAME="main_project"
export OS_PROJECT_DOMAIN_ID="119f4676f307434eaf28daab5ba3cc92"
if [ -z "$OS_REGION_NAME" ]; then unset OS_REGION_NAME; fi
if [ -z "$OS_USER_DOMAIN_NAME" ]; then unset OS_USER_DOMAIN_NAME; fi
if [ -z "$OS_PROJECT_DOMAIN_ID" ]; then unset OS_PROJECT_DOMAIN_ID; fi
echo "Please enter your OpenStack Password for project $OS_PROJECT_NAME as user $OS_USERNAME: "
read -sr OS_PASSWORD_INPUT
export OS_PASSWORD=$OS_PASSWORD_INPUT
export OS_AUTH_TYPE=password
export OS_USER_DOMAIN_NAME="cloud_00373"
#!/usr/bin/env bash
unset OS_TENANT_ID
unset OS_TENANT_NAME
export OS_AUTH_URL=https://keystone.cloudferro.com:5000/v3
export OS_INTERFACE=public
export OS_IDENTITY_API_VERSION=3
export OS_USERNAME="owner"
export OS_REGION_NAME="FRA1-3"
export OS_PROJECT_ID=ab0c8e1710854b92b0be2b40b31a615a
export OS_PROJECT_NAME="main_project"
export OS_PROJECT_DOMAIN_ID="119f4676f307434eaf28daab5ba3cc92"
if [ -z "$OS_REGION_NAME" ]; then unset OS_REGION_NAME; fi
if [ -z "$OS_USER_DOMAIN_NAME" ]; then unset OS_USER_DOMAIN_NAME; fi
if [ -z "$OS_PROJECT_DOMAIN_ID" ]; then unset OS_PROJECT_DOMAIN_ID; fi
echo "Please enter your OpenStack Password for project $OS_PROJECT_NAME as user $OS_USERNAME: "
read -sr OS_PASSWORD_INPUT
export OS_PASSWORD=$OS_PASSWORD_INPUT
export OS_AUTH_TYPE=password
export OS_USER_DOMAIN_NAME="cloud_00373"
#!/usr/bin/env bash
unset OS_TENANT_ID
unset OS_TENANT_NAME
export OS_AUTH_URL=https://keystone.cloudferro.com:5000/v3
export OS_INTERFACE=public
export OS_IDENTITY_API_VERSION=3
export OS_USERNAME="owner"
export OS_REGION_NAME="LCJ1-1"
export OS_PROJECT_ID=ab0c8e1710854b92b0be2b40b31a615a
export OS_PROJECT_NAME="main_project"
export OS_PROJECT_DOMAIN_ID="119f4676f307434eaf28daab5ba3cc92"
if [ -z "$OS_REGION_NAME" ]; then unset OS_REGION_NAME; fi
if [ -z "$OS_USER_DOMAIN_NAME" ]; then unset OS_USER_DOMAIN_NAME; fi
if [ -z "$OS_PROJECT_DOMAIN_ID" ]; then unset OS_PROJECT_DOMAIN_ID; fi
echo "Please enter your OpenStack Password for project $OS_PROJECT_NAME as user $OS_USERNAME: "
read -sr OS_PASSWORD_INPUT
export OS_PASSWORD=$OS_PASSWORD_INPUT
export OS_AUTH_TYPE=password
export OS_USER_DOMAIN_NAME="cloud_00373"
Note
If OS_USER_DOMAIN_NAME is missing from your RC file, add it according to your environment.
Download RC files for the receiving users
The user user_1 should follow the same procedure:
Sign in to Horizon.
Choose project project_1.
Download the OpenStack RC File for user user_1 and project project_1.
Example project_1-openrc.sh file:
#!/usr/bin/env bash
unset OS_TENANT_ID
unset OS_TENANT_NAME
export OS_AUTH_URL=https://keystone.cloudferro.com:5000/v3
export OS_INTERFACE=public
export OS_IDENTITY_API_VERSION=3
export OS_USERNAME="user_1"
export OS_REGION_NAME="WAW4-1"
export OS_PROJECT_ID=4d488c376c0b4bc79a60b56bc72834e8
export OS_PROJECT_NAME="p_project_1"
export OS_PROJECT_DOMAIN_ID="119f4676f307434eaf28daab5ba3cc92"
if [ -z "$OS_REGION_NAME" ]; then unset OS_REGION_NAME; fi
if [ -z "$OS_USER_DOMAIN_NAME" ]; then unset OS_USER_DOMAIN_NAME; fi
if [ -z "$OS_PROJECT_DOMAIN_ID" ]; then unset OS_PROJECT_DOMAIN_ID; fi
echo "Please enter your OpenStack Password for project $OS_PROJECT_NAME as user $OS_USERNAME: "
read -sr OS_PASSWORD_INPUT
export OS_PASSWORD=$OS_PASSWORD_INPUT
export OS_AUTH_TYPE=password
export OS_USER_DOMAIN_NAME="cloud_00373"
#!/usr/bin/env bash
unset OS_TENANT_ID
unset OS_TENANT_NAME
export OS_AUTH_URL=https://keystone.cloudferro.com:5000/v3
export OS_INTERFACE=public
export OS_IDENTITY_API_VERSION=3
export OS_USERNAME="user_1"
export OS_REGION_NAME="WAW3-1"
export OS_PROJECT_ID=4d488c376c0b4bc79a60b56bc72834e8
export OS_PROJECT_NAME="p_project_1"
export OS_PROJECT_DOMAIN_ID="119f4676f307434eaf28daab5ba3cc92"
if [ -z "$OS_REGION_NAME" ]; then unset OS_REGION_NAME; fi
if [ -z "$OS_USER_DOMAIN_NAME" ]; then unset OS_USER_DOMAIN_NAME; fi
if [ -z "$OS_PROJECT_DOMAIN_ID" ]; then unset OS_PROJECT_DOMAIN_ID; fi
echo "Please enter your OpenStack Password for project $OS_PROJECT_NAME as user $OS_USERNAME: "
read -sr OS_PASSWORD_INPUT
export OS_PASSWORD=$OS_PASSWORD_INPUT
export OS_AUTH_TYPE=password
export OS_USER_DOMAIN_NAME="cloud_00373"
#!/usr/bin/env bash
unset OS_TENANT_ID
unset OS_TENANT_NAME
export OS_AUTH_URL=https://keystone.cloudferro.com:5000/v3
export OS_INTERFACE=public
export OS_IDENTITY_API_VERSION=3
export OS_USERNAME="user_1"
export OS_REGION_NAME="WAW3-2"
export OS_PROJECT_ID=4d488c376c0b4bc79a60b56bc72834e8
export OS_PROJECT_NAME="p_project_1"
export OS_PROJECT_DOMAIN_ID="119f4676f307434eaf28daab5ba3cc92"
if [ -z "$OS_REGION_NAME" ]; then unset OS_REGION_NAME; fi
if [ -z "$OS_USER_DOMAIN_NAME" ]; then unset OS_USER_DOMAIN_NAME; fi
if [ -z "$OS_PROJECT_DOMAIN_ID" ]; then unset OS_PROJECT_DOMAIN_ID; fi
echo "Please enter your OpenStack Password for project $OS_PROJECT_NAME as user $OS_USERNAME: "
read -sr OS_PASSWORD_INPUT
export OS_PASSWORD=$OS_PASSWORD_INPUT
export OS_AUTH_TYPE=password
export OS_USER_DOMAIN_NAME="cloud_00373"
#!/usr/bin/env bash
unset OS_TENANT_ID
unset OS_TENANT_NAME
export OS_AUTH_URL=https://keystone.cloudferro.com:5000/v3
export OS_INTERFACE=public
export OS_IDENTITY_API_VERSION=3
export OS_USERNAME="user_1"
export OS_REGION_NAME="FRA1-2"
export OS_PROJECT_ID=4d488c376c0b4bc79a60b56bc72834e8
export OS_PROJECT_NAME="p_project_1"
export OS_PROJECT_DOMAIN_ID="119f4676f307434eaf28daab5ba3cc92"
if [ -z "$OS_REGION_NAME" ]; then unset OS_REGION_NAME; fi
if [ -z "$OS_USER_DOMAIN_NAME" ]; then unset OS_USER_DOMAIN_NAME; fi
if [ -z "$OS_PROJECT_DOMAIN_ID" ]; then unset OS_PROJECT_DOMAIN_ID; fi
echo "Please enter your OpenStack Password for project $OS_PROJECT_NAME as user $OS_USERNAME: "
read -sr OS_PASSWORD_INPUT
export OS_PASSWORD=$OS_PASSWORD_INPUT
export OS_AUTH_TYPE=password
export OS_USER_DOMAIN_NAME="cloud_00373"
#!/usr/bin/env bash
unset OS_TENANT_ID
unset OS_TENANT_NAME
export OS_AUTH_URL=https://keystone.cloudferro.com:5000/v3
export OS_INTERFACE=public
export OS_IDENTITY_API_VERSION=3
export OS_USERNAME="user_1"
export OS_REGION_NAME="FRA1-3"
export OS_PROJECT_ID=4d488c376c0b4bc79a60b56bc72834e8
export OS_PROJECT_NAME="p_project_1"
export OS_PROJECT_DOMAIN_ID="119f4676f307434eaf28daab5ba3cc92"
if [ -z "$OS_REGION_NAME" ]; then unset OS_REGION_NAME; fi
if [ -z "$OS_USER_DOMAIN_NAME" ]; then unset OS_USER_DOMAIN_NAME; fi
if [ -z "$OS_PROJECT_DOMAIN_ID" ]; then unset OS_PROJECT_DOMAIN_ID; fi
echo "Please enter your OpenStack Password for project $OS_PROJECT_NAME as user $OS_USERNAME: "
read -sr OS_PASSWORD_INPUT
export OS_PASSWORD=$OS_PASSWORD_INPUT
export OS_AUTH_TYPE=password
export OS_USER_DOMAIN_NAME="cloud_00373"
#!/usr/bin/env bash
unset OS_TENANT_ID
unset OS_TENANT_NAME
export OS_AUTH_URL=https://keystone.cloudferro.com:5000/v3
export OS_INTERFACE=public
export OS_IDENTITY_API_VERSION=3
export OS_USERNAME="user_1"
export OS_REGION_NAME="LCJ1-1"
export OS_PROJECT_ID=4d488c376c0b4bc79a60b56bc72834e8
export OS_PROJECT_NAME="p_project_1"
export OS_PROJECT_DOMAIN_ID="119f4676f307434eaf28daab5ba3cc92"
if [ -z "$OS_REGION_NAME" ]; then unset OS_REGION_NAME; fi
if [ -z "$OS_USER_DOMAIN_NAME" ]; then unset OS_USER_DOMAIN_NAME; fi
if [ -z "$OS_PROJECT_DOMAIN_ID" ]; then unset OS_PROJECT_DOMAIN_ID; fi
echo "Please enter your OpenStack Password for project $OS_PROJECT_NAME as user $OS_USERNAME: "
read -sr OS_PASSWORD_INPUT
export OS_PASSWORD=$OS_PASSWORD_INPUT
export OS_AUTH_TYPE=password
export OS_USER_DOMAIN_NAME="cloud_00373"
The user user_2 should follow the same procedure for project project_2.
Source the RC files
Each user should open their terminal and source their own RC file.
For user owner:
$ source main-openrc.sh
Please enter your OpenStack Password for project main as user owner:

(owner) $ swift list
c-main-a
c-main-b
c-main-d
For user_1:
$ source project_1-openrc.sh
Please enter your OpenStack Password for project project_1 as user user_1:

(user_1) $ swift list
c-project_1-a
c-project_1-b
For user_2:
$ source project_2-openrc.sh
Please enter your OpenStack Password for project project_2 as user user_2:

(user_2) $ swift list
c-project_2-a
c-project_2-b
Upload test files
The user owner prepares and uploads test files.
Create and upload two files to c-main-a:
(owner) $ touch test-main-a1.txt
(owner) $ touch test-main-a2.txt
(owner) $ swift upload c-main-a test-main-a1.txt
test-main-a1.txt
(owner) $ swift upload c-main-a test-main-a2.txt
test-main-a2.txt
Create and upload one file to c-main-b:
(owner) $ touch test-main-b.txt
(owner) $ swift upload c-main-b test-main-b.txt
test-main-b.txt
Create and upload one file to c-main-d:
(owner) $ touch test-main-d.txt
(owner) $ swift upload c-main-d test-main-d.txt
test-main-d.txt
Find user IDs
To grant access, you need the user ID of the receiving user.
User user_1 checks their ID:
(user_1) $ openstack user show --format json "${OS_USERNAME}" | jq -r .id
3de5f40b4e6d433792ac387896729ec8
User user_2 checks their ID:
(user_2) $ openstack user show --format json "${OS_USERNAME}" | jq -r .id
fb4ec0de674d4c5ba608ee75cc6da918
Check the current container ACL
The owner can check the current status of container c-main-a:
(owner) $ swift stat c-main-a
                     Account: v1
                   Container: c-main-a
                     Objects: 2
                       Bytes: 29
                    Read ACL:
                   Write ACL:
                     Sync To:
                    Sync Key:
                 X-Timestamp: 1655199342.39064
X-Container-Bytes-Used-Actual: 8192
            X-Storage-Policy: default-placement
             X-Storage-Class: STANDARD
               Last-Modified: Tue, 14 Jun 2022 13:41:32 GMT
                  X-Trans-Id: tx000000000000003964e44-0062b17ebb-17404e6b-default
      X-Openstack-Request-Id: tx000000000000003964e44-0062b17ebb-17404e6b-default
               Accept-Ranges: bytes
                Content-Type: text/plain; charset=utf-8
In this example, Read ACL and Write ACL are not set yet.
Grant read access
Grant read access to container c-main-a for user_1. Replace the user ID with the value obtained for your user.
(owner) $ swift post --read-acl "*:3de5f40b4e6d433792ac387896729ec8" c-main-a
Get the Object Storage URL
The owner gets the Object Storage URL from their authenticated session:
(owner) $ swift auth | awk -F = '/OS_STORAGE_URL/ {print $2}'
https://s3.waw4-1.cloudferro.com/swift/v1
(owner) $ swift auth | awk -F = '/OS_STORAGE_URL/ {print $2}'
https://s3.waw3-1.cloudferro.com/swift/v1
(owner) $ swift auth | awk -F = '/OS_STORAGE_URL/ {print $2}'
https://s3.waw3-2.cloudferro.com/swift/v1
(owner) $ swift auth | awk -F = '/OS_STORAGE_URL/ {print $2}'
https://s3.fra1-2.cloudferro.com/swift/v1
(owner) $ swift auth | awk -F = '/OS_STORAGE_URL/ {print $2}'
https://s3.fra1-3.cloudferro.com/swift/v1
(owner) $ swift auth | awk -F = '/OS_STORAGE_URL/ {print $2}'
https://s3.lcj1-1.cloudferro.com/swift/v1
Pass the resulting URL to user_1.
For reference, the URL format is:
https://s3.waw4-1.cloudferro.com/swift/v1
https://s3.waw3-1.cloudferro.com/swift/v1
https://s3.waw3-2.cloudferro.com/swift/v1
https://s3.fra1-2.cloudferro.com/swift/v1
https://s3.fra1-3.cloudferro.com/swift/v1
https://s3.lcj1-1.cloudferro.com/swift/v1
Grant write access
A similar procedure can be used to grant write permission to user_1.
Replace the user ID with the value obtained for your user:
(owner) $ swift post --write-acl "*:3de5f40b4e6d433792ac387896729ec8" c-main-a
After this change, user_1 can upload or modify objects in c-main-a, depending on the permissions available in your environment.
What to do next
These articles may also be useful: