
How to transfer volumes between domains and projects using Horizon dashboard on CloudFerro Cloud
Volumes in OpenStack can be used to store data. They are visible to virtual machines as drives.
A volume is usually available only to the project in which it was created. Moving the data stored on such a volume between projects can take a long time, especially if the volume contains hundreds or thousands of gigabytes.
This article describes how to transfer the ownership of a volume from one project to another using the Horizon dashboard. This allows you to move a volume directly from the source project to the destination project without copying the data.
The source project and the destination project must be in the same cloud region. They can belong to different users, domains, or organizations.
What we are going to cover
Initializing a volume transfer
Accepting a volume transfer
Cancelling a volume transfer
Prerequisites
No. 1 Account
You need a CloudFerro Cloud hosting account with access to the Horizon interface: https://horizon.cloudferro.com/auth/login/?next=/.
No. 2 Volume
You need a volume that you want to transfer.
The volume must not be attached to a virtual machine. Its Status must be Available.
You can check the status of the volume in Volumes -> Volumes in the Horizon dashboard. In the screenshot below, the status is marked with a green rectangle.
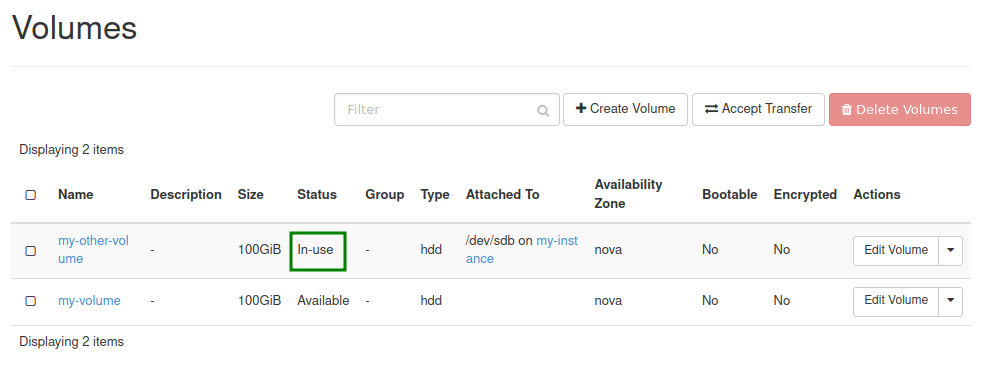
Fig. 54 Volume status in Horizon
The following article explains how to detach a volume from a virtual machine: How to move data volume between two VMs using OpenStack Horizon on CloudFerro Cloud
No. 3 Ability to perform operations on both projects
For the transfer to be successful, you need to:
initiate the transfer from the source project,
accept the transfer from the destination project.
If the source or destination project is not managed by you, ask a user with the required permissions in that project to perform the relevant part of the workflow.
To access each project directly, you can sign in to the appropriate account or use the project switcher at the top of the Horizon dashboard.
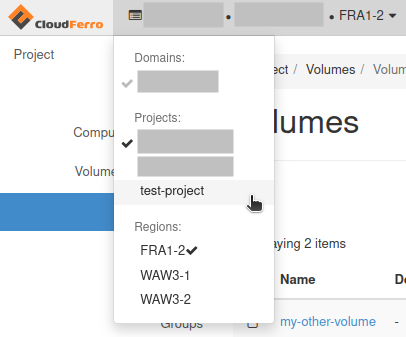
Fig. 55 Project switcher in Horizon
Step 1: Initialize the volume transfer
Perform this step in the source project.
Navigate to Volumes -> Volumes in the Horizon dashboard.
Confirm that the volume you want to transfer has Status set to Available. In the example below, this requirement is met. The value is marked with a blue rectangle.
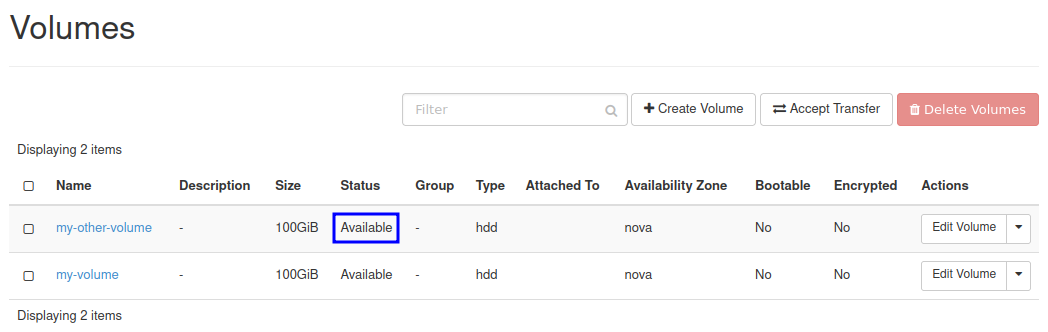
Fig. 56 Available volume in the source project
If your volume has a different status, do not continue. Check Prerequisite No. 2 and detach the volume if needed.
In the row representing the volume you want to transfer, open the drop-down menu in the Actions column and choose Create Transfer.
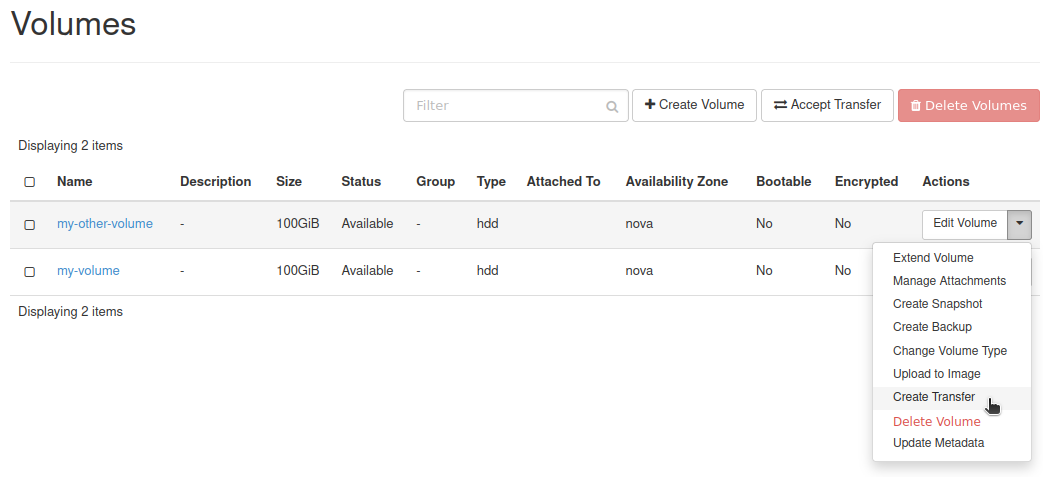
Fig. 57 Create Transfer action in Horizon
You should see the following window.
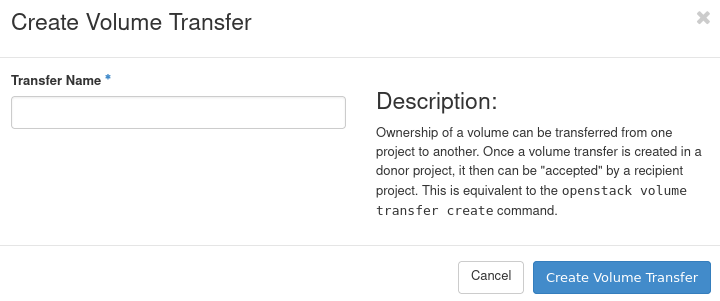
Fig. 58 Create Volume Transfer window
Enter a descriptive name in the Transfer Name text field and click Create Volume Transfer.
You should now see the transfer credentials.
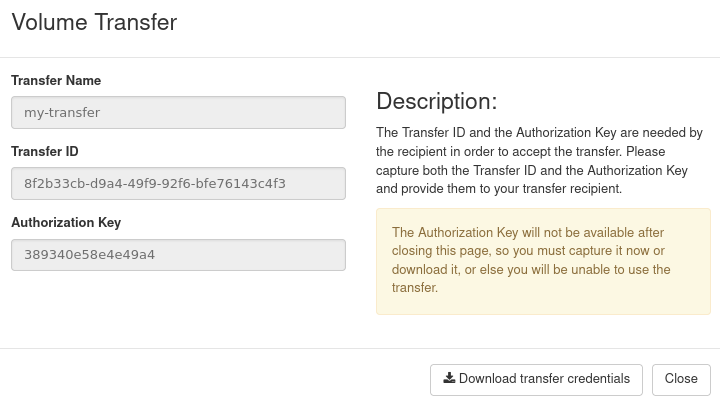
Fig. 59 Volume transfer credentials
Write down the Transfer ID and Authorization Key. You can also use Download transfer credentials to download these values as a plain text file.
Warning
These credentials allow the recipient to accept the volume transfer while the transfer is active. Protect them and share them only with the intended recipient.
After saving the credentials, click Close.
The volume should now have Status set to Awaiting Transfer.
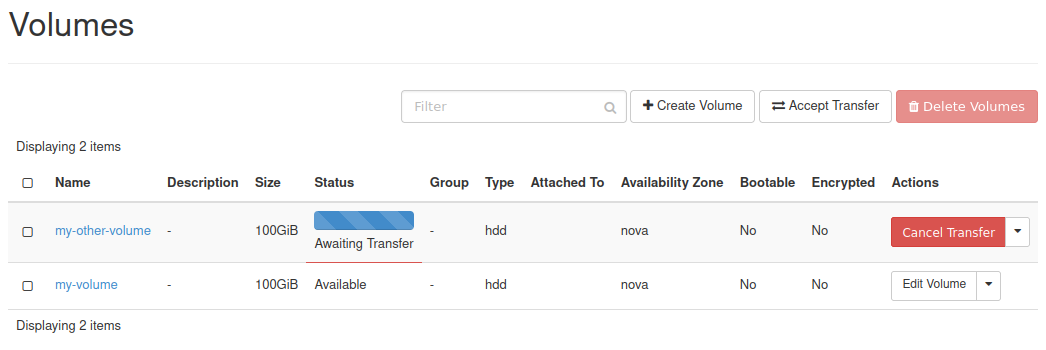
Fig. 60 Volume awaiting transfer
After the transfer is initialized, the volume cannot be attached to a virtual machine until the transfer is accepted or cancelled.
Step 2: Accept the volume transfer
Perform this step in the destination project.
Navigate to Volumes -> Volumes in the Horizon dashboard and click Accept Transfer.
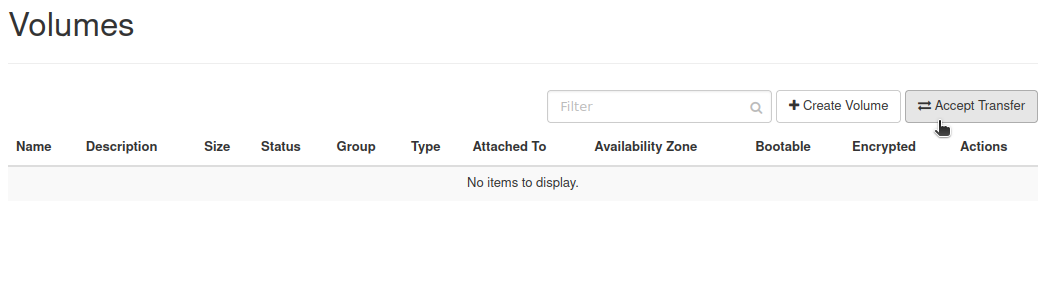
Fig. 61 Accept Transfer button in Horizon
You should see the following window.
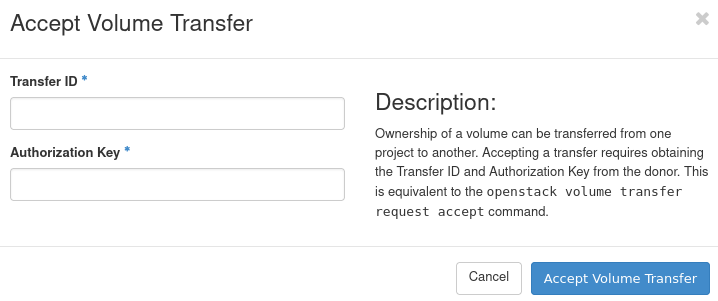
Fig. 62 Accept Volume Transfer window
Enter the Transfer ID and Authorization Key obtained in Step 1.
Click Accept Volume Transfer.
The volume should now be visible in the destination project.
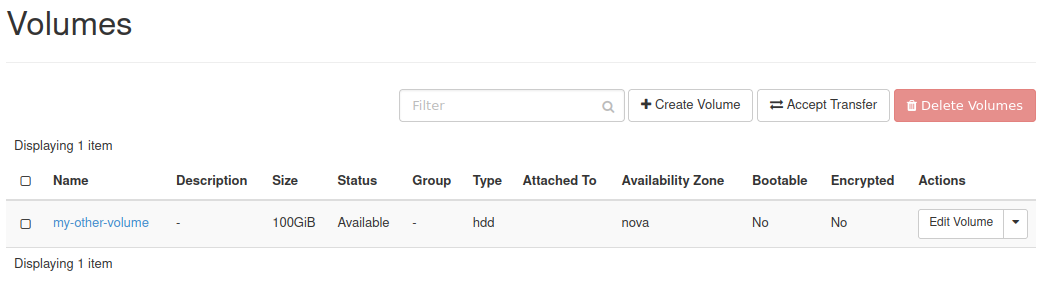
Fig. 63 Transferred volume visible in the destination project
Cancelling a volume transfer
If you accidentally initiated a transfer for the wrong volume and the transfer has not been accepted yet, you can cancel it.
Perform this step in the source project.
Navigate to Volumes -> Volumes in the Horizon dashboard.
Fig. 64 Volumes list in Horizon
In this example, assume that a transfer was accidentally created for volume my-volume. Because of that, its status is Awaiting Transfer. Such a volume cannot be attached to an instance while the transfer remains active.
To cancel the transfer, click Cancel Transfer in the Actions column of the volume row.
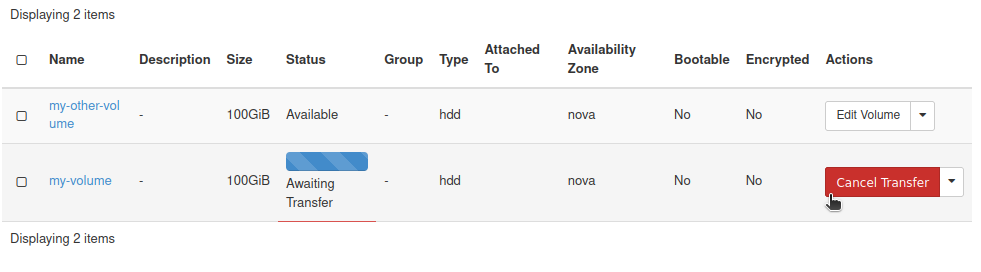
Fig. 65 Cancel Transfer action in Horizon
You will be asked for confirmation.
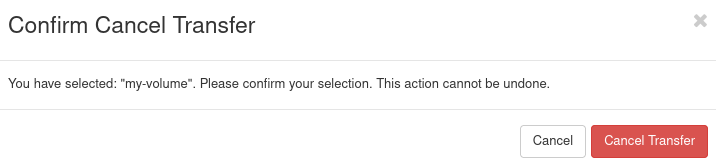
Fig. 66 Confirm cancellation of volume transfer
Click Cancel Transfer.
If the operation is successful, you should get a message in the top-right corner of the Horizon dashboard.
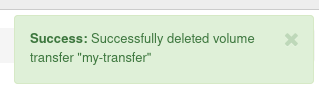
Fig. 67 Volume transfer cancellation message
The message can be confusing if you read only its first line. It does not mean that the volume was removed. It means that the volume transfer was cancelled.
After cancellation, the volume should again have Status set to Available.
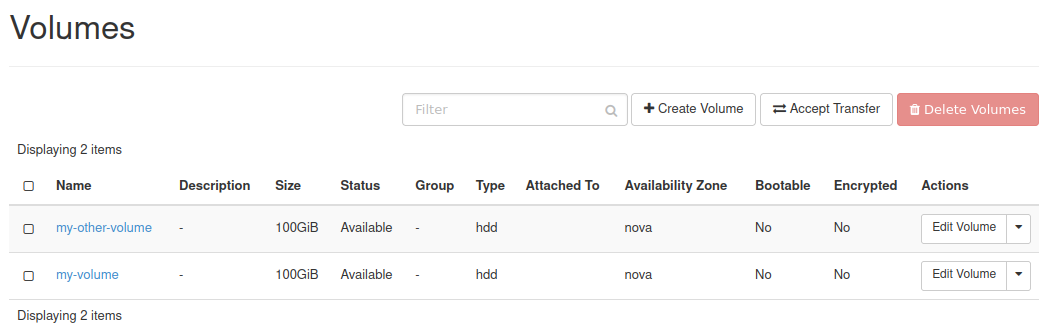
Fig. 68 Volume available after cancelling transfer
What to do next
After the volume has been transferred, you may want to attach it to a virtual machine.
How to move data volume between two VMs using OpenStack Horizon on CloudFerro Cloud
The workflow described in this article can also be performed using OpenStack CLI.
How to transfer volumes between domains and projects using OpenStack CLI client on CloudFerro Cloud