Spot instances on CloudFerro Cloud
Spot instance is resource similar to Amazon EC2 Spot Instances or Google Spot VMs. In short, user is provided with unused computational resources for a discounted price but those resources can be terminated on a short time notice whenever on-demand usage increases. The main use case are ephemeral workflows which can deal with being terminated unexpectedly and/or orchestration platforms which can deal with forced scaling down of available resources e.g. Kubernetes clusters.
What We Are Going To Cover
How to create spot instances
Additional configuration via tags
What is the expected behaviour
Prerequisites
No. 1 Account
You need a CloudFerro Cloud hosting account with access to the Horizon interface: https://horizon.cloudferro.com/auth/login/?next=/
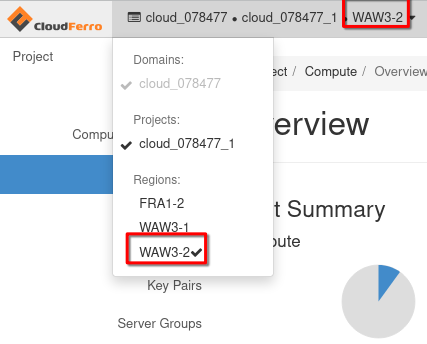
No. 2 Available exclusively on WAW3-2 cloud
When using spot instances, be sure to work only on WAW3-2 cloud:
No. 3 Using quotas and flavors
For quotas, see this article: Dashboard Overview – Project Quotas And Flavors Limits on CloudFerro Cloud
No. 3 OpenStack CLI client
If you want to interact with CloudFerro Cloud cloud using OpenStack CLI client, you need to have it installed. Check one of these articles:
How to install OpenStackClient for Linux on CloudFerro Cloud
How to install OpenStackClient GitBash for Windows on CloudFerro Cloud
Once you have installed this piece of software, you need to authenticate to start using it: How to activate OpenStack CLI access to CloudFerro Cloud cloud using one- or two-factor authentication
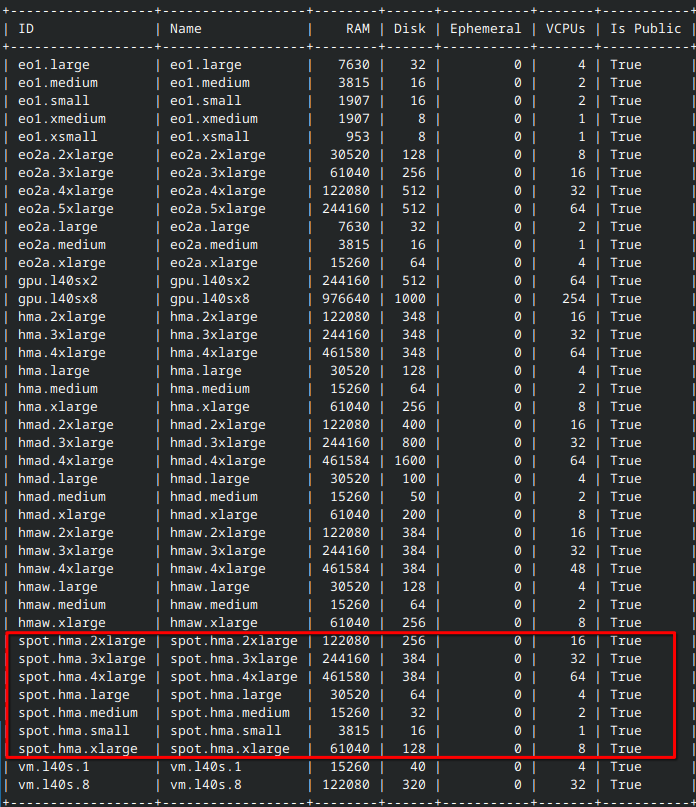
To test whether the openstack command is working, list flavors:
openstack flavor list
This is the result and there is a group of spot. flavors, marked here in red rectangle:
No. 4 Creation of a new instance
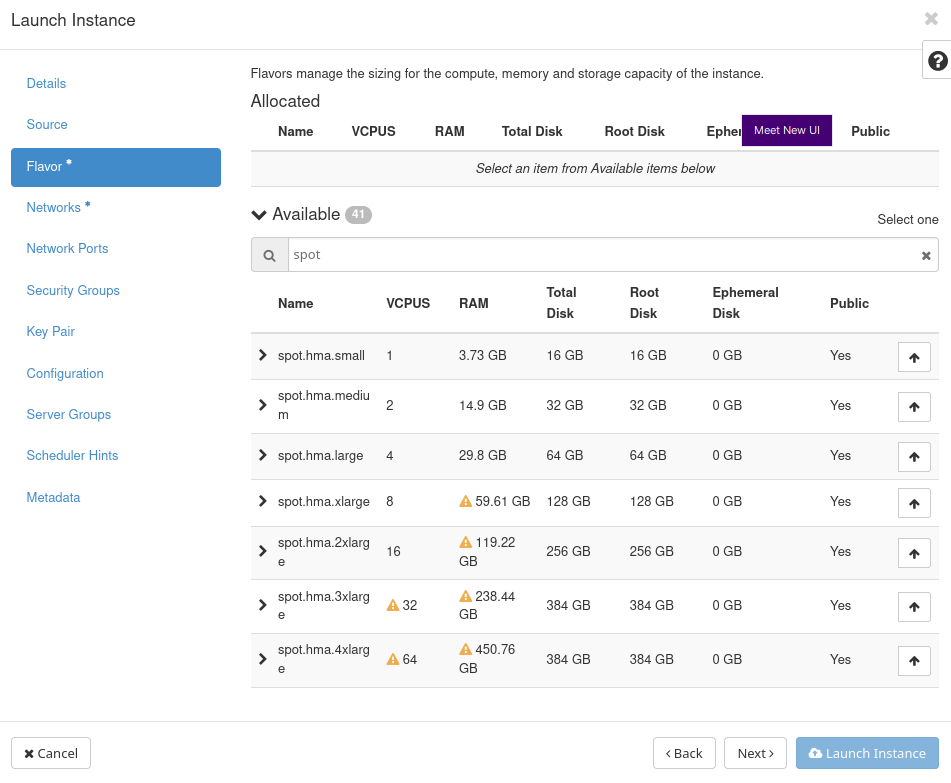
A spot instance is an instance which is created in a normal way, say, as explained in this article: How to create a Linux VM and access it from Linux command line on CloudFerro Cloud save for the fact that in Step 3 of that article, you are choosing a flavor that starts with word spot.:
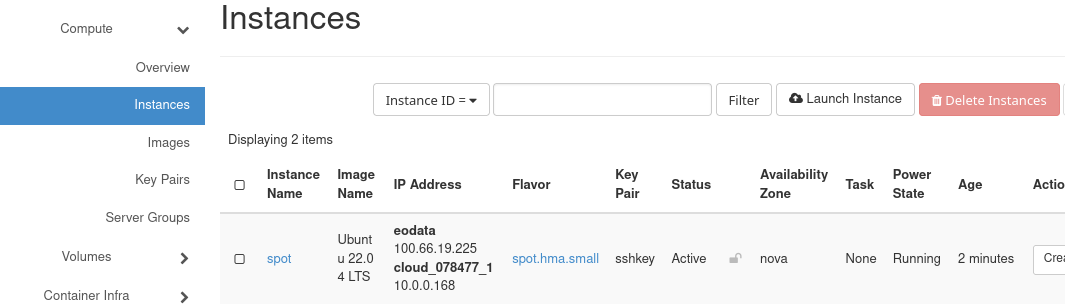
You can see the flavor when the instance is created:
How to create spot instances
The only prerequisite for an instance being a spot instance is the use of specific flavor. They are typically denoted as
spot.<name of non-spot flavor>
and have exactly the same parameters as their non-spot counterparts. Hence, user is able to just as easily schedule spot instance via Horizon and Openstack CLI. Additionally, one can confirm that a flavor is indeed a spot flavor by using openstack CLI. A command such as
openstack flavor show spot.hma.small -f json -c properties
should contain cf:spot.instance set to True.

The expected behaviour of spot instances
Currently, spot instances use the same project quota as on-demand instances and, under normal circumstances, behave identically to their non-ephemeral counterparts. When resources in the cloud become tight, the behaviour changes as well – scheduling an on-demand instance might still be possible but scheduling a spot instance may become unavailable. This is to make sure that on-demand user’s experience is prioritized.
How to convert spot instance to on-demand instance
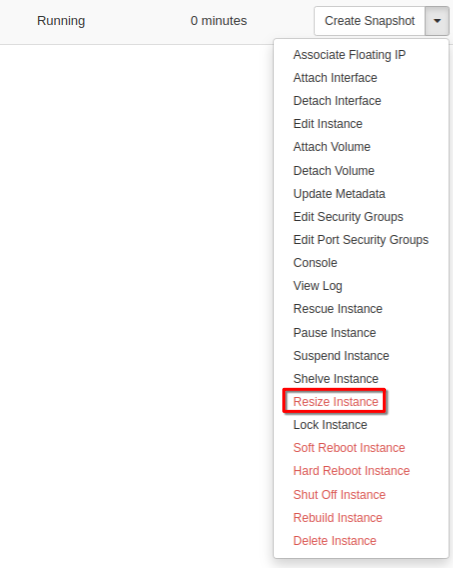
If you receive notification that a spot instance is about to be deleted, you can prevent it by resizing it to a normal on-demand instance. (Note that instead of paying reduced price for spot instances, you are back to paying normal price for on-demand instances.)
You can resize instance through Horizon:
With CLI, you can use a command like this:
openstack server resize INSTANCE_NAME FLAVOR_NAME
Additional commands of interest are:
openstack server resize --confirm INSTANCE_NAME
openstack server resize --revert INSTANCE_NAME
openstack server show INSTANCE_NAME
Shelving is not available for spot instances.